Relics are a groundbreaking addition to Raid Shadow Legends in December 5 2024 (Patch 10.00) alongside Chimera Clan Boss, offering players the ability to enhance their Champions with stat bonuses and unique Abilities. These powerful items can be customized, upgraded, and tailored to suit your team’s needs. Whether you’re looking to boost your Champion’s survivability, damage output, or utility, Relics provide unparalleled flexibility and strategic depth. This guide will walk you through everything you need to know about Relics, from their core mechanics and customization options to their Rank, Rarity, and how they integrate with Gemstones.
Relics and Gemstone Guide
Master the complexities of the Relic and Gemstone system with this comprehensive technical manual. This guide breaks down the mechanics of relic enhancement, from optimizing Champion performance via strategic Gemstone socketing to navigating the various Relic categories found across different game modes.
Whether you are a F2P player maximizing limited resources or an endgame veteran chasing the Arena meta, our rankings will help you prioritize your upgrades and dominate the competition.
Standard Relics form the foundational set of 11 relics, including 4 Rare, 3 Epic, 2 Legendary, and 2 Mythical artifacts, making them a staple in every player’s arsenal. Unlike other relic types, they do not require dedicated crafting materials, as they are automatically forged 50% of the time when using any relic crafting materials in the Forge. As the most abundant relics available, they serve as the backbone for early progression and remain relevant throughout your journey, ensuring that every player has access to a reliable and versatile set of tools to enhance their champions.
Icon
Relics Description
Volcardiac Heart
Wearer places a 10% [Magma Shield] buff for 2 turns at the start of the battle. Also places a 10% [Magma Shield] buff on the wearer for 2 turns whenever they lose 25% of their HP in a single hit. Level 2: Shield Strength +2% Level 3: Shield Strength +2% Level 4: Shield Strength +2% Level 5: Shield Strength +2% Level 6: Shield Strength +2% Stats: 96 RES, 3185 HP, 104 DEF Guide: Volcardiac Heart is an SS-Tier relic built for go-second Arena teams, giving tanky revivers and high-RES champions a powerful edge. Its unique shield not only boosts survivability but also reflects damage, turning enemy AoE nukers like Marius the Gallant into their own worst enemy. Champions such as Starsage Galathir, Marichka the Unbreakable, and Wight Queen Ankora make exceptional use of this relic to keep their team standing while punishing opponents in return. Lore: Ripped, still beating, from the fiery chest of Tekton the Searblood. On command, a wall of licking flames radiates from this granite-hard Demonic heart, burning arrows and melting blades.
Hallowed Hilt
Whenever the wearer heals an ally with an active skill, has a 25% chance to place the [Fervor] buff on the ally for 1 turn. Level 2: Buff Chance +5% Level 3: Buff Chance +5% Level 4: Buff Chance +5% Level 5: Buff Chance +5% Level 6: Buff Chance +5% Stats: 24 SPD, 3185 HP, 28 RES Guide: Hallowed Hilt is an SS-Tier relic that provides one of the strongest SPD boosts in the game, making it a top choice for your fastest Arena champion to secure turn order. Each time the wearer heals an ally there is a chance to grant the unique Fervor buff, adding bonus damage and giving extra value when used on healers or buffers. Champions like Arbiter, Siphi the Lost Bride, and Theodosia the Disgraced can make excellent use of this relic, turning both their speed and healing into a win condition. Lore: From the broken blade of Saint Mariam of Pureheart, Savior of Bleakgorge Keep, Martyr of the Red Fields. Resides within the heart of the Eternal Citadel’s most holy armory, made ready for war in dire times.
Aspect of Siroth
Whenever the wearer receives fatal damage, reduces it by 50% of their Turn Meter and then fully reduces their Turn Meter. Cooldown: 1 turn. Level 2: Damage Reduction +10% Level 3: Damage Reduction +10% Level 4: Damage Reduction +10% Level 5: Damage Reduction +10% Level 6: Damage Reduction +10% Stats: 398 DEF, 51 RES, 28 ACC Guide: Aspect of Siroth is an A-Tier relic that shines on champions who contribute through passives rather than active turns, while also providing protection against enemies that can bypass Stoneskin. When the wearer takes fatal damage, the relic reduces the hit by consuming half of their Turn Meter before fully dropping it, which can stop an early knockout in its tracks. This relic is particularly effective in Arena against deadly threats like Georgid because it can prevent an instant defeat. Champions such as Freyja Fateweaver, Rotos the Lost Groom and Ultimate Deathknight gain the most from this effect, turning potentially fatal hits into opportunities to keep fighting. Lore: They whom the Shadow God deems must live are granted the Aspect of Siroth. This burning, Demonic skull is bound with the dark magic of Anathraad itself, fed with the souls of mortals to allow its passage to Teleria.
Wand of Submission
Wearer has a 25% chance to reflect [Stun], [Sleep], [Fear], [True Fear], [Freeze], [Provoke], [Petrification] and [Sheep] debuffs back at the producer. Level 2: Buff Reflect Chance +5% Level 3: Buff Reflect Chance +5% Level 4: Buff Reflect Chance +5% Level 5: Buff Reflect Chance +5% Level 6: Buff Reflect Chance +5% Stats: 6120 HP, 12 SPD, 28 ACC Guide: Wand of Submission is an SS-Tier relic that dominates in Arena by reflecting powerful crowd control debuffs back at their source. With a chance to turn effects like Stun, Sleep, Fear, True Fear, Freeze, Provoke, Petrification, and Sheep against opponents, it both shields your champions and disrupts enemies in one move. This makes it a top choice for debuff-focused teams and champions who thrive on controlling the battlefield. Champions such as Armanz the Magnificent, Nais the Shadowthief, and Odin Faefather can maximize its value, turning enemy tricks into their own advantage. Lore: Bloodquartz honed to jagged, mountain-like points. A stone of power and protection, set within a spiked blackiron device with a visage of death. To harm the wielder is to harm oneself.
Gilded Dragonstone
Wearer’s DEF increases by 1% each time they receive damage (stacks up to 10%). Level 2: Max DEF +2% Level 3: Max DEF +2% Level 4: Max DEF +2% Level 5: Max DEF +2% Level 6: Max DEF +2% Stats: 398 DEF, 51 RES, 1662 HP Guide: Gilded Dragonstone is a B-Tier relic that boosts the wearer’s DEF each time they take damage, stacking up to 10 percent. It serves as a budget-friendly option for DEF-based damage dealers and shines on champions whose Shields scale with DEF, providing extra durability in tough fights. Champions such as Helicath, Valkyrie, and Vault Keeper Wixwell can take full advantage of this relic, though most damage dealers may prefer stronger alternatives. Lore: An egg of solid gold, the size of a spawnling’s head. Rare even at the Dragonkin Empire’s height, now only a handful exist. Each radiates a will-restoring heat, filling the bearer with calm confidence.
Demonic Effigy
Wearer’s Turn Meter increases by 10% whenever one of their allies dies. Level 2: Turn Meter Boost +2% Level 3: Turn Meter Boost +2% Level 4: Turn Meter Boost +2% Level 5: Turn Meter Boost +2% Level 6: Turn Meter Boost +2% Stats: 6120 HP, 51 RES, 6 SPD Guide: Demonic Effigy is a C-Tier relic that increases the wearer’s Turn Meter by ten percent each time an ally falls in battle. It can work on tanky revivers to help them act faster after a teammate’s death, but its impact is limited compared to stronger relic options. Champions such as Dawncaller Sabitha, Raglin and Rector Drath may see some benefit, though most players will likely choose higher-tier relics for their revivers. Lore: This statue is bound with Siroth’s boons. By his will, those carrying it are made fleet of foot, shrug off the effects of Lumayan magic, and their wounds restitch themselves before the very eyes of the foe.
Golden Elixir
Wearer is instantly healed by 10% when their HP drops below 50%. Level 2: Heal +2% Level 3: Heal +2% Level 4: Heal +2% Level 5: Heal +2% Level 6: Heal +2% Stats: 398 ATK, 51 ACC, 1662 HP Guide: Golden Elixir is an S-Tier relic that provides an instant ten percent heal when the wearer’s HP falls below fifty percent, making it a lifesaver for tanky champions. It excels in tough boss fights where staying alive is crucial, helping solo champions endure longer and maintain pressure. Champions such as Aox the Rememberer, Strategos Islin, Geomancer, Niamhe Spear of Nyresa, Urost the Soulcage, and Vergis can make the most of this relic, turning critical moments into opportunities to stay in the fight. Lore: The Arbiter’s tears are golden streams upon a shimmering pale face. When collected, they shine with her radiance, a light in dark places and dark times, and a healing balm that soothes the most savage wounds.
Unholy Grail
Wearer deals 2% more damage if under any buffs. Level 2: Damage +1% Level 3: Damage +1% Level 4: Damage +1% Level 5: Damage +1% Level 6: Damage +2% Stats: 398 ATK, 3185 HP, 11% C.DMG Guide: Unholy Grail is a F-Tier relic that gives the wearer a small two percent damage boost while under any debuffs, making it a very minor stat increase. As the first free relic, it is notably weak and should be replaced at the earliest opportunity. Its main value lies in being used as fodder to strengthen other relics, though it can provide a slight damage boost to ATK, DEF, or HP nuker champions when they are affected by enemy debuffs. Lore: Self re-filling with miasmic potions steaming, viscous and lambent. Many have claimed it, many have been ensnared by it. Its claws bore deep, its coils bind tight. Myriad are its boons, but each is a curse.
Mask of Rage
Wearer receives 5% less damage from enemies under a [Provoke] debuff. Level 2: Damage Reduction +2% Level 3: Damage Reduction +2% Level 4: Damage Reduction +2% Level 5: Damage Reduction +2% Level 6: Damage Reduction +2% Stats: 6120 HP, 204 DEF, 28 ACC Guide: Mask of Rage is a F-Tier relic that reduces damage taken by five percent when the wearer is affected by a Provoke debuff, but its effect is minimal. It is best used as fodder to power up stronger relics and serves only as a temporary option for Provoke champions. Most players will want to replace it quickly with more impactful relics to maximize their team’s performance. Lore: Anger darkens a soul. Shrouds a mind with a crimson cloud, thick and clawing. Witness the noble made crass, the measured made feckless. This weakness, this sickness, once induced, renders a being a marionette.
Journal of Necrotos
Wearer’s heals and Turn Meter increase effects applies to allies are boosted by 15%. Level 2: Heal & TM Increase Boost +3% Level 3: Heal & TM Increase Boost +3% Level 4: Heal & TM Increase Boost +3% Level 5: Heal & TM Increase Boost +3% Level 6: Heal & TM Increase Boost +3% Stats: 6120 HP, 204 DEF, 28 RES Guide: Journal of Necrotos is an A-Tier relic that boosts the wearer’s healing and Turn Meter increase effects applied to allies by fifteen percent, making it a powerful tool for support champions. It excels on champions who specialize in Turn Meter manipulation, like Arbiter, or strong healers such as Apothecary and Tagoar. Champions like Senna Amberheart also benefit from this relic, making it a versatile choice that enhances two of the most universally valuable effects in the game. Lore: Consumed with knowledge, was Necrotos the Reader, a hoarder of spells and histories, of tales and philosophies. No tome’s price was too great, no volume’s secrets too dangerous to peruse. His obsession was his doom.
Rod of Blasphemy
Wearer receives 2% less damage if under any debuffs. Level 2: Damage Reduction +1% Level 3: Damage Reduction +1% Level 4: Damage Reduction +1% Level 5: Damage Reduction +1% Level 6: Damage Reduction +2% Stats: 6120 HP, 204 ATK, 28 ACC Guide: Rod of Blasphemy is a F-Tier relic that reduces damage taken by two percent while the wearer is under any debuffs, offering only a minor defensive benefit. It is primarily used as fodder to enhance stronger relics and stands as one of the weakest options in the game. Until a better relic is obtained, it can serve as a basic HP booster, but its overall impact is very limited. Lore: Only blind monks of the Order may be in its presence. Siroth-touched, it is said to be. Immune to forge fire, dispeller of Lumayan dark-breaker magic, shatterer of blessed hammers and axes. Should evil ever find it…
Chimera Relics
Chimera Relics represent a highly sought-after set of 11 powerful relics, comprising 4 Rare, 3 Epic, 2 Legendary, and 2 Mythical artifacts, crafted using materials obtained exclusively from the Chimera Clan Boss. As the second most common relic set, they are widely accessible due to the weekly availability of Chimera as a resource source, making them a staple for many players. Not only are these relics generally stronger than Standard Relics, but they also offer unique advantages, with the Chimera Trials standing out as the sole source of mythical materials, further cementing their importance in optimizing your champions’ potential.
Icon
Relics Description
Stormcaller
Wearer has a 20% chance of placing a [Stormcall] buff on themselves whenever they land a critical hit. Level 2: Buff Chance +10% Level 3: Buff Chance +10% Level 4: Buff Chance +10% Level 5: Buff Chance +25% Level 6: Buff Chance +25% Stats: 40% C.DMG, 204 ATK, 6 SPD Guide: Stormcaller shines as an SS-Tier relic that amplifies damage while adding a heavy dose of Stuns. It works best on champions who can hit multiple times with AoE skills or trigger frequent Ally Attacks and Counterattacks, with standouts including Marius the Gallant, Kro’khad the Throatripper, Khoronar, Cupidus, and Gharol Bloodmaul. Lore: The power of the fiercest tempest thrums in this weapon, so heavy only the mightiest can wield it. There is no plate it cannot buckle, no shield it cannot break, no wall it cannot breach.
Chronocube
Wearer has a 50% chance to take 2 turns in a row. If this effect activates, wearer skips the next turn. Occurs only once per battle. Level 2: Extra Turn Chance +10% Level 3: Extra Turn Chance +10% Level 4: Extra Turn Chance +10% Level 5: Extra Turn Chance +10% Level 6: Extra Turn Chance +10% Stats: 6120 HP, 204 ATK, 104 DEF Guide: Chronocube is an S-Tier relic that guarantees an Extra Turn, allowing champions to unleash two powerful abilities back-to-back for a game-changing advantage in the Arena. It excels on champions like Armanz the Magnificent, who can strip buffs with his A3 before draining Turn Meter with his A2, or on Queen of Hearts for seamless skill chains. However, it’s less effective on Mythical champions since form-switching interactions cause them to lose a turn. Lore: Not enough time. So has felt many a Telerian sorcerer, among them Egrisk the Lined. He neglected food and sleep to fashion this arcane device that could slow localized time. Though successful, the effort cost him his
Gorecrescent
Wearer’s next attack after killing an enemy deals 20% more damage. Level 2: Damage +5% Level 3: Damage +5% Level 4: Damage +5% Level 5: Damage +5% Level 6: Damage +10% Stats: 398 ATK, 21% C.DMG, 6 SPD Guide: Gorecrescent is an S-Tier relic that empowers burst champions who can take down an enemy with one hit, even through defenses like Stone Skin, Unkillable, Block Damage, and then follow up with another powerful strike. It performs best in fast battles against lighter opponents, making it highly effective in the Arena or when clearing waves, with top users including Ailil, Georgid the Breaker, and Rotos the Lost Groom. Lore: A crimson haze hangs over the bearer, their skin slick with the blood of thousands slain. The blade, ever sharp, takes limbs and heads, but remains forever clean.
Hand of Uncreation
Wearer reduces the chance of debuff application, buff removal or steal effects, Turn Meter reduction effects, and increase skill cooldown effects by 10%. Level 2: Effect Chance Reduction +2% Level 3: Effect Chance Reduction +2% Level 4: Effect Chance Reduction +2% Level 5: Effect Chance Reduction +2% Level 6: Effect Chance Reduction +2% Stats: 96 ACC, 51 RES, 6 SPD Guide: Hand of Uncreation is a B-Tier relic that serves as a viable alternative to the Wand of Submission, particularly for teams built to go second in the Arena. Its effects can be impactful, but the low activation rates make it unreliable as a primary strategy. Champions like Ramantu Drakesblood and Mithrala Lifebane can make good use of it when consistency is not the main concern. Lore: It sprouted from the walls of the Grand Arcanist’s seeping laboratories. A throttler of thralls. A clawer of beasts. A sewer of sorcery. Hewn from its birthplace, it was bound in scrolls of dark magic.
Scroll of the Unseen
Wearer’s damage increases by 1% each time any other Champion takes a turn when the wearer is under a [Veil] or [Perfect Veil] buff (stacks up to 30%). Damage bonus resets after the wearer takes a turn. Level 2: Damage +1% Level 3: Damage +1% Level 4: Damage +1% Level 5: Damage +1% Level 6: Damage +1% Stats: 398 ATK, 21% C.DMG, 6 SPD Guide: Scroll of the Unseen is a A-Tier relic that works best on slower, heavy-hitting champions in Clan Boss teams, provided they remain under Veil at all times. When paired with the right speed-tuning, it can deliver a substantial damage boost, with champions like Ninja and Trunda Giltmallet benefiting the most. However, many players may find higher-tier damage relics to be more consistent and easier to maximize in practice. Lore: The creation of a blind warrior-monk. An unblinking aperture. An infinite page. Seeking weaknesses in armor, weapons and battle-spells. So much to record. So much to exploit.
Orb of Transfixion
Wearer has a 10% chance to steal 1 random buff when attacking a target. This effect cannot be resisted. Occurs once per skill. Level 2: Steal Chance +5% Level 3: Steal Chance +5% Level 4: Steal Chance +5% Level 5: Steal Chance +5% Level 6: Steal Chance +5% Stats: 6120 HP, 51 ACC, 6 SPD Guide: Orb of Transfixion is a B-Tier relic suited for Arena champions who rely on frequent attacks to strip away powerful buffs such as Stone Skin, Block Damage, or other key protections. It can be valuable on champions like Mighty Ukko and Lord Entertainer Fabian, though its potential is limited by the low chance of activation. Lore: A hypnotic eye in a sphere of glass, piercing and soul-scrying. Darkest fears and wildest dreams it sees, its hunger for secrets insatiable. To what end? Cruel amusement.
Irethi Coronet
Wearer’s damage increases by 1% each time they place a debuff (stacks up to 30%). Level 2: Damage +1% Level 3: Damage +1% Level 4: Damage +1% Level 5: Damage +1% Level 6: Damage +1% Stats: 398 ATK, 51 ACC, 1662 HP Guide: Irethi Coronet is an S-Tier relic that shines on damage dealers who can stack multiple debuffs and perform best in prolonged battles such as Clan Boss fights. It provides consistent, high damage without the need to rely on relic ranks, making it one of the most reliable options for sustained encounters. Champions like Thor Faehammer, Ninja, and Trunda Giltmallet are excellent choices for maximizing its value. Lore: Many a wizard-scholar and sorcerer-prince have crowned themselves in fell Ireth, that city of darkness, of malice, of depraved insanity. Their diadems are foul objects, spiked and shrouded with evil power.
Malefic Talon
Wearer has a 20% chance to deal 10% more damage when attacking. Level 2: Extra Damage Chance +5% Level 3: Extra Damage Chance +5% Level 4: Extra Damage Chance +5% Level 5: Extra Damage Chance +5% Level 6: Extra Damage Chance +10% Stats: 40% C.DMG, 3185 HP, 104 ATK Guide: Malefic Talon is a B-Tier relic that gives a clean boost to any champion built around critical damage. It may not bring flashy effects, but it shines as a dependable filler, especially for early-game damage dealers. Champions with skills that scale off Enemy MAX HP or Shield capacity, such as Titus Blackplume, Seer, and Royal Guard, can push their damage even further with this relic. Lore: The eye-clawed fiend is a beast with three—dozen bladed limbs. Each drips with corrosive sap that melts metal, flesh, and stone. Wicked are the weapons, like this, made of such things. Tools for murder most vile.
Diadem of Undeath
Wearer’s DEF increases by 1% for each ally under an [Ally Protection] buff placed by them. Level 2: DEF +1% Level 3: DEF +1% Level 4: DEF +1% Level 5: DEF +1% Level 6: DEF +1% Stats: 398 DEF, 3185 HP, 28 RES Guide: Diadem of Undeath is a F-Tier relic that sees little real use beyond being fed into stronger relics. It can offer some value on Ally Protectors, giving minor support to champions like Miscreated Monster or Nazana, but overall it falls short compared to better options. For most players, it ends up as a stepping stone for powering up more impactful relics rather than a long-term choice, with starter champions being its most likely wearers. Lore: Hundreds of dead monarchs lie uneasy in soil, sand, and rock, many self-proclaimed, many murdered by rivals fixating on their power. Their crowns thrum with a thirst for vengeance unquenched by time.
Tempus Sanguinis
Wearer’s Turn Meter reduction effects are boosted by 15%. Level 2: Turn Meter Reduction +3% Level 3: Turn Meter Reduction +3% Level 4: Turn Meter Reduction +3% Level 5: Turn Meter Reduction +3% Level 6: Turn Meter Reduction +3% Stats: 6120 HP, 51 ACC, 104 DEF Guide: Tempus Sanguinis is a B-Tier relic that empowers champions who specialize in Turn Meter reduction, making their control abilities hit even harder. It is especially effective in early boss fights such as Spider and Fire Knight, as well as in Faction Wars where keeping enemies locked down is key. Alure and Gnut stands out as the perfect user, turning her already devastating Turn Meter control into a game-changing weapon. Lore: The vampire’s curse is a cruel fate indeed. Each heartbeat without a drop of blood brings one closer to becoming a bat-like monster. The timer drips, each a reminder to feed, each a torture.
Molten Deathbell
Wearer’s Turn Meter increases by 10% when applying [Stun], [Sleep], [Fear], [True Fear], [Freeze], [Provoke], [Petrification] and [Sheep] debuffs to enemies. Occurs once per turn. Level 2: Turn Meter Boost +2% Level 3: Turn Meter Boost +2% Level 4: Turn Meter Boost +2% Level 5: Turn Meter Boost +2% Level 6: Turn Meter Boost +2% Stats: 96 ACC, 204 DEF, 1662 HP Guide: Molten Deathbell is an A-Tier relic that is perfect for crowd control champions who thrive on keeping enemies locked down and pairing well with high accuracy. Champions like Armanz the Magnificent and Lord Entertainer Fabian can maximize this effect, rapidly reapplying their debuffs to maintain constant control over the battlefield. Lore: Once of the Ogryn Korugar, filled with his wrath. Taken from him and cursed by the insane smiths of Anathraad, all servants of the Shadow God are emboldened by its tocsins, the clarion call of fiery destruction and death.
Clan Relics
Relics in the Clan Group can only be crafted in the Forge using Gilded Medallions. You can get these from the Clan Shop. The chance to craft a Relic from the Clan Group cannot exceed 50%.
Icon
Relics Description
Murderfang
Wearer has a 25% chance to deal bonus damage when using default skills. Bonus damage is either 3% (single-target hits) or 1% (AoE hits) of target’s MAX HP. Level 2: Bonus Damage Chance +5% Level 3: Bonus Damage Chance +5% Level 4: Bonus Damage Chance +5% Level 5: Bonus Damage Chance +10% Level 6: Bonus Damage Chance +10% Stats: 398 ATK, 21% C.DMG, 1662 HP Guide: Murderfang is an A-Tier relic that works best on Clan Boss champions who frequently counterattack or trigger Ally Attacks, making it a solid choice for sustained damage over time. Champions like Kro’khad the Throatripper, Khoronar, Cupidus, Cardiel, Vault Keeper Wixwell, and Ronda can make the most of this relic, though its limited activation keeps it from being among the strongest Mythical options. Lore: Sigil of the Dragonkin’s great warrior-physicians, seized during the Sin of Dragons. Now malice and venom—seeped, corrupted by Siroth’s fleshmelders and soultwysters. A single stab will draw a torrent of blood.
Chrysalid of Rebirth
Wearer has a 30% chance to get an Extra Turn when reviving allies or themselves. Level 2: Extra Turn Chance +10% Level 3: Extra Turn Chance +10% Level 4: Extra Turn Chance +10% Level 5: Extra Turn Chance +20% Level 6: Extra Turn Chance +20% Stats: 24 SPD, 3185 HP, 104 DEF Guide: Chrysalid of Rebirth is an SS-Tier relic that pairs perfectly with champions who thrive on revival, combining a massive SPD boost with one of the most impactful effects in the game. Champions like Elva Autumnborn, Lady Noelle, and Starsage Galathir can make full use of this relic, solidifying it as the best-in-slot for most revivers. Lore: The macabre symbol of an Insect Lord of Durham – the Ever-growing Chrysalid, the Undying Lepid, the Cocooned Horror. Its followers seem to defy death itself, molting from their old bodies into new, more twisted
Essence Quencher
Wearer’s damage is increased by 20% of the target’s current Turn Meter. Damage cannot be increased by more than 10% (5% against Bosses) Level 2: Max Damage +2% / +1% Level 3: Max Damage +2% / +1% Level 4: Max Damage +2% / +1% Level 5: Max Damage +2% / +1% Level 6: Max Damage +2% / +1% Stats: 40% C.DMG, 204 ATK, 1662 HP Guide: Essence Quencher is an S-Tier relic that is a strong choice for general damage dealers and shines particularly on champions whose attacks scale with HP. Champions like Taras the Fierce and Wight King Narses can maximize this relic, making it a reliable pick for consistent damage output. Lore: A creation of Ireth, every soul gaoled within this vial writhes and bowls in torment. Each is a former owner who has killed a former owner. The Quencher thirsts for spirits. The stronger a foe, the greater its hunger.
Temporal Stagnator
Wearer has a 20% chance to remove, steal, or convert buffs, or increase a skill’s cooldown when landing a weak hit. Level 2: Effect Chance +5% Level 3: Effect Chance +5% Level 4: Effect Chance +5% Level 5: Effect Chance +5% Level 6: Effect Chance +10% Stats: 96 ACC, 12 SPD, 28 RES Guide: Temporal Stagnator is an A-Tier relic that works best on champions with lockout who are not void affinity, turning minor attacks into strategic opportunities. Champions like Alika, Lord Entertainer Fabian, and Night Queen Krixia can capitalize on this niche effect to disrupt enemies and control the battlefield. Lore: A creation of the Archmage Hellmut, stolen long ago. A chronomantic device of such power even its maker did not understand; its crackling, prismatic energies are barely contained by a rune-plated
Infernosphere
Wearer’s RES increases by 2% for every 5% of HP lost (stacks up to 20%). Level 2: Max RES +2% Level 3: Max RES +2% Level 4: Max RES +2% Level 5: Max RES +2% Level 6: Max RES +2% Stats: 96 RES, 3185 HP, 104 DEF Guide: Infernosphere is an A-Tier relic that serves as a strong RES stat-stick for champions built around high resistance, helping them endure longer in tough fights. Champions like Ultimate Deathknight and Wight Queen Ankora can take full advantage of this relic, making it a rare and valuable option for any high-RES build. Lore: An orb of fiery magma that endlessly ripples and shifts, contained by holy Lumayan magic. To clutch it is to feel pain that purifies the soul and hardens one against the seductions of Darkness.
Valkanen’s Grasp
Wearer reflects 5% of damage absorbed by [Block Damage] or [Unkillable] buffs back to the attacker. Level 2: Reflect Damage +5% Level 3: Reflect Damage +5% Level 4: Reflect Damage +5% Level 5: Reflect Damage +5% Level 6: Reflect Damage +5% Stats: 6120 HP, 204 DEF, 28 RES Guide: Valkanen’s Grasp is a C-Tier relic that provides a minor boost to damage, making it situational but useful in specific scenarios. It shines when completing the damage reflection Trial in Chimera or when aiming for clever plays in Arena. Champions who has Block Damage or Unkillable skill such as Helicath, Niamhe Spear of Nyresa, Odin Faefather, and Demytha can make the most of this relic in these niche situations. Lore: A clawed hand reaches through the mirror’s shimmering darkness. It is at once horrifying yet beguiling. Its offer cannot be refused yet cannot be accepted. Power. Life. Victory. At the mere price of a soul, Valkanen learned.
The Fleshrender
Wearer increases the damage of each hit on their next attack by 3% of any surplus heal when self-healing. Damage cannot be increased by more than 20,000, and will reset after each attack. Level 2: Damage +1% Level 3: Damage +1% Level 4: Damage +1% Level 5: Damage +1% Level 6: Damage +2% Stats: 398 DEF, 3185 HP, 11% C.DMG Guide: The Fleshrender is a F-Tier relic that provides no significant benefits on its own and is primarily used as fodder to level up stronger relics. It serves as a temporary option until better relics are available, making it a basic but necessary part of upgrading your more impactful equipment. Lore: Accursed weapon and tool of torture both, forged in Anathraad, steel quenched in the ichor of Demons. The blades spin faster with every sample of flesh. Many a confession has it drawn, many a mangled corpse has it left.
Blackshroud_Fan
Wearer receives 2% less damage from [Ally Protection] effects or buffs placed by them. Level 2: Damage Reduction +1% Level 3: Damage Reduction +1% Level 4: Damage Reduction +1% Level 5: Damage Reduction +1% Level 6: Damage Reduction +2% Stats: 6120 HP, 204 DEF, 28 RES Guide: The Blackshroud Fan was once written off as an F-tier relic with little combat value, mostly serving as fodder to boost stronger gear, but it has found new life as a specialized tool for survival. Its effect reduces incoming damage by 2 percent for every Ally Protection placed by the wearer, scaling up to 8 percent per effect, which means a team can reach an impressive 32 percent reduction when four protections are active. That kind of durability is a game changer in the right setup, especially in Clan Boss fights with champions like Toragi the Frog or Krisk the Ageless who thrive on Ally Protection mechanics. While it is still not a relic you will want in every lineup, it has evolved from a disposable placeholder into a clever niche option, earning a respectable mid tier rating of 6 out of 10 for its ability to turn synergy into meaningful staying power. Lore: How great were the gifts given to Lady Mikage upon her coronation. Among them, a fan lined with razor-sharp blades and adorned with Demonic sigils. An evil thing, but one flick can ward off a spell or deflect a blade.
Live Arena Relics
Introducing a brand-new set of 8 relics (2 Rare, 2 Epic, 2 Legendary, and 2 Mythical), the Live Arena Relics bring a thrilling twist to relic crafting. These relics are crafted exclusively using Runed Obsidian, a unique material earned through participation in the Live Arena. As with other exclusive relic sets, there’s a maximum 50% chance to craft these when using their specific materials, but players will always retain a base 50% chance to forge Standard Relics instead. While the exact difficulty of acquiring Runed Obsidian from Live Arena remains uncertain, these relics promise to become a highly coveted addition for those eager to elevate their champions’ power in competitive play.
Icon
Relics Description
Infernal Polytope
Fully resets the cooldowns of the wearer’s skills whenever their HP drops below 15%. Cooldown: 3 turns. Level 2: HP Drop Requirement +5% Level 3: HP Drop Requirement +5% Level 4: HP Drop Requirement +5% Level 5: HP Drop Requirement +5% Level 6: HP Drop Requirement +5% Stats: 6120 HP, 12 SPD, 104 DEF Guide: Infernal Polytope is an S-Tier relic that excels on tanky Arena champions, particularly those with Unkillable or Cheat Death mechanics, giving them a significant edge in survival. Its powerful effect can turn the tide of battle, though reaching several ranks is necessary to trigger it reliably. Champions such as Knave of Hearts, Starsage Galathir, and Theodosia the Disgraced can maximize its potential to dominate tough Arena matchups. Lore: Dark, rune-inscribed star metal. Infinite is the space within. An unsettling product of a paranoid Irethi mind — a jealous hoarder of evil talismans. She housed them in this, behind a fiendish puzzle and spiteful curses.
The Deathdealer
Wearer’s attacks will always be critical hits, but the wearer receives 200% more damage. Level 2: Extra Damage Received -20% Level 3: Extra Damage Received -20% Level 4: Extra Damage Received -20% Level 5: Extra Damage Received -20% Level 6: Extra Damage Received -20% Stats: 398 ATK, 3185 HP, 6 SPD Guide: The Deathdealer is an SS-Tier relic that prevents weak hits from negative affinity matchups, making it a must-have for affinity-based debuffers and champions with strong passives who can handle the downside. It ensures critical abilities land consistently, turning high-stakes fights into manageable encounters. Champions such as Embrys the Anomaly, Lord Entertainer Fabian, and Rotos the Lost Groom benefit immensely, reliably hitting key skills and maximizing their impact in battle. Lore: From whence did this nightmarish blade come? Some cursed forge in a Lumaya-forsaken place. An ocean of blood cannot satiate it. Wielders are driven mad with gore-lust, heeding not their own lives as they butcher and kill.
Harp of Kasbiel
Wearer’s Turn Meter fills by 5% each time they use a skill that doesn’t deal damage. Level 2: Turn Meter Increase +2% Level 3: Turn Meter Increase +2% Level 4: Turn Meter Increase +2% Level 5: Turn Meter Increase +2% Level 6: Turn Meter Increase +2% Stats: 6120 HP, 51 RES, 6 SPD Guide: Harp of Kasbiel is an A-Tier relic that grants a steady boost to Turn Meter, making it ideal for support champions who lack active attacking skills. Its consistent effect helps these niche champions contribute more frequently to the fight, enhancing team performance. Champions such as Authoratrix Lamasu and Lady Noelle can maximize this relic to keep their allies supported and effective throughout the battle. Lore: How beauteous the tunes, how enchanting the harmonies, of the Lightbringer and composer supreme, Kasbiel of the Symphony. With each pluck of his enchanted, golden harp, he could enliven the most fatigued soul.
Ax Serpentis
Wearer’s single-target attacks deal 5% more damage for each Exposed Neck present in the battle. Level 2: Damage +2% Level 3: Damage +2% Level 4: Damage +2% Level 5: Damage +2% Level 6: Damage +2% Stats: 6120 HP, 21% C.DMG, 104 ATK Guide: Ax Serpentis is a C-Tier relic with minimal impact, best kept in the vault until any potential buffs are introduced. Its effects are weak and highly situational, though the gem sockets offer slight value. It is generally not recommended for regular use, but it can provide some utility for single-target damage nukers in Hydra Clan Boss battles. Lore: Cast in bronze by a Lizardman master—magesmith, long dead. Abandoned in Ireth centuries ago, now uncovered. Its power still thrums. Its thirst for vengeance, unquenched. Its blade as sharp as it was the day of its forging.
Preserved Aberration
Wearer will ignore 2% of a target’s DEF for each [Poison] debuff on the target placed by the wearer. Level 2: Ignore DEF +1% Level 3: Ignore DEF +1% Level 4: Ignore DEF +1% Level 5: Ignore DEF +1% Level 6: Ignore DEF +2% Stats: 398 ATK, 51 ACC, 11% C.DMG Guide: Preserved Aberration is a B-Tier relic that boosts damage for poison-focused champions who also deal strong direct attacks. While it is currently outshined by Arachnelixir, it still provides a solid damage increase for niche champions who can take advantage of it. Champions such as Balar the Lost, Nell Blackteeth, and Supreme Kael can make the most of this relic’s damage boost. Lore: Many are the hideous creations of Anathraad’s fleshmelders and terror-breeders. Teodor the Savant stole this hybrid monstrosity of scorpion, cockerel, and lizard from one – another prize for his collection of curios.
Moondeath Orchid
Wearer deals pure damage equal to 20% of their ATK to enemies that resist debuffs from the wearer. This damage cannot be critical. Level 2: Damage +10% Level 3: Damage +10% Level 4: Damage +10% Level 5: Damage +20% Level 6: Damage +30% Stats: 398 ATK, 3185 HP, 6 SPD Guide: Moondeath Orchid is a C-Tier relic that provides backup damage for Bomb or Poison champions, particularly against high-RES enemies in Arena. Its effect is delayed, requiring higher ranks to reach meaningful impact, which limits its early usefulness. Champions such as Gaius the Gleeful, Gnishak Verminlord, and Ramantu Drakesblood can benefit once the relic is fully ranked. Lore: Bioluminescent blooms from the depths of Durham Forest. Its seeds sprout from rotting flesh, the beautiful flowers irresistible to the hungry. Toxic petals kill the eater, providing new flesh for the cycle to begin again.
Royal Digit
Wearer has a 20% chance to decrease incoming damage by 10%. Level 2: Damage Reduction Chance +5% Level 3: Damage Reduction Chance +5% Level 4: Damage Reduction Chance +5% Level 5: Damage Reduction Chance +5% Level 6: Damage Reduction Chance +10% Stats: 398 ATK, 3185 HP, 11% C.DMG Guide: Royal Digit is a F-Tier relic with no real combat value, serving primarily as fodder to level up stronger relics. It is best used to enhance higher-tier equipment, acting as a temporary placeholder until more impactful relics are available. Lore: Ripped from the frozen hand of a dead king of Frostheim. Ripples with deathly rime magic, the result of a heinous murder by a monstrous creation of ice and shadow magic: the Ice Golem.
Draught of Ire
Wearer deals 5% more damage using their default skill when all other skills are on cooldown. Level 2: Damage +2% Level 3: Damage +2% Level 4: Damage +2% Level 5: Damage +2% Level 6: Damage +2% Stats: 6120 HP, 204 ATK, 28 ACC Guide: Draught of Ire is a B-Tier relic that is mainly used as fodder to level up stronger relics, but it can provide minor utility for damage nukers who rely heavily on their A1 ability. Champions who benefit from basic attacks that trigger ally join attacks or counterattacks, such as Cupidus, Khoronar, and Kro’khad the Throatripper, can make some use of it, though it is still far less impactful than higher-tier relics. Lore: To earn Lady Mikage’s favor was to pay a high price indeed. Drinking from this brass koi granted blessings of resilience and strength but in return, Lady Mikage could take over her servant’s mind at will.
Event Relics
Relics in the Event Group can be obtained during time-limited in-game Events. You can get crafting materials for Relics from different places, depending on the Event. The chance to craft a Relic from the Event Group cannot exceed 50%.
Alice’s Adventure Relics
Icon
Relics Description
The Cat’s Gaze
Wearer ignores 10% of the target’s DEF when attacking enemies with higher MAX HP. Level 2: Ignore DEF +2% Level 3: Ignore DEF +2% Level 4: Ignore DEF +2% Level 5: Ignore DEF +2% Level 6: Ignore DEF +2% Stats: 40% C.DMG, 204 ATK, 104 DEF Guide: The Cat’s Gaze is an SS-Tier relic that pushes damage dealers to terrifying new heights by stacking Ignore Defence for explosive results. It shines brightest on non-HP-based champions, giving them a huge edge in arena and boss fights where cutting through defenses is the difference between victory and defeat. While its value caps once you reach full Ignore Defence, the relic is still a top choice for champions without innate defense-piercing mechanics. Fighters like Marius the Gallant, Siegfrund the Nephilim, and Sun Wukong make ideal candidates, turning their raw power into devastating precision. Lore: A hammer claw’d. A mocking eye. Those this maul strikes will definitely die. It strengthens the weak against the strong, rewarding the right who fight the wrong. Wield it and be brazen, for it rewardeth not the craven.
Hatter’s Reserve
Wearer receives 5% less damage from enemies whose ATK is lower than the wearer’s. Also inflicts 5% more damage to enemies whose MAX HP is lower than the wearer’s. Level 2: Damage Modifier +1% Level 3: Damage Modifier +1% Level 4: Damage Modifier +1% Level 5: Damage Modifier +1% Level 6: Damage Modifier +1% Stats: 6120 HP, 204 ATK, 11% C.DMG Guide: Hatter’s Reserve is a C-Tier relic that serves as a serviceable option for HP-based damage dealers who lack stronger alternatives. While it won’t break the game, it still provides a respectable bump in damage output, especially in arena scenarios where every bit of extra punch counts. Champions like Arix, Magnarr, Ishiyama the Immovable, Wight King Narses can make practical use of it, but most players will eventually look for more impactful relics to maximize their nukers. Lore: From the plants and beasts of Durham, this was made, crushed and mixed in darkened glade. Blended so the strong may destroy the weak, this world is for them, not the meek.
Chaos Awakes Relics
Icon
Relics Description
Covetous Passion
Wearer receives a 15% [Shatter] buff for 2 turns at the start of a Round. Has a 30% chance to place a 15% [Shatter] buff on the wearer for 1 turn upon killing an enemy. Level 2: Effect Chance +10% Level 3: Effect Chance +10% Level 4: Effect Chance +10% Level 5: Effect Chance +20% Level 6: Effect Chance +20% Stats: 398 ATK, 21% C.DMG, 104 DEF Guide: Covetous Passion is an SS-Tier relic that shines as a powerhouse pick for arena nukers and wave clear champions. Functioning as a strong alternative to Cat’s Gaze, it delivers high-value damage without needing to be ranked up, which makes it both efficient and reliable. While it falls short against Clan Boss battles, it more than makes up for it in fast-paced encounters. Champions like Seer, Siegfrund the Nephilim, and Sun Wukong can unleash devastating results with it equipped. Lore: An intangible fist of flame, drawn from Anathraad’s infernos and bound to Kurosa the Covetous. A symbol of her devotion to Siroth, and desire to see Teleria placed under his unending creative and destructive power.
Crown of Corruption
Weaerer deals 5% more damage and receives 5% less damage when above 50% HP. When below 50% HP, wearer deals 25% less damage and receives 15% more damage. Level 2: Damage Dealt +2.5%, Received -2% Level 3: Damage Dealt +2.5%, Received -2% Level 4: Damage Dealt +2.5%, Received -2% Level 5: Damage Dealt +5.0%, Received -2% Level 6: Damage Dealt +7.5%, Received -2% Stats: 24 SPD, 21% C.DMG, 1662 HP Guide: Crown of Corruption sits in SS-Tier and remains one of the most lethal arena relics thanks to its massive flat SPD gain and impressive damage potential, even after the nerf. It does require deep investment into ranks five and six before it truly shines, but once built it can transform champions like Embrys the Anomaly, Hierophant Lazarius, and Marius the Gallant into blazing fast damage dealers that control the pace of battle. Lore: An crown of fused bone, taken from slain Corrupted. Seeping with dark magic. Made by Balar the Lost to wear when all of the Mistwood is consumed with shadow, the malignancy within rewarding success and punishing.
Skull of Treason
[HP Burn] debuffs placed by the wearer deal 10% more damage to enemies with higher MAX HP. Level 2: Damage +5% Level 3: Damage +5% Level 4: Damage +5% Level 5: Damage +10% Level 6: Damage +15% Stats: 96 ACC, 204 DEF, 6 SPD Guide: Skull of Treason sits firmly in S-Tier for Arena and Siege, delivering absurd value when paired with the Incinerate Blessing, though much of its punch is locked behind the final ranks. Champions like Gizmak the Terrible, Sulfuryion, Vizug the Noxious and Vulkanos Fumor turn it into a weapon of pure destruction, punishing opponents who cannot keep up with the escalating burn damage. It is not just strong, it is oppressive, making it one of the nastiest tools for anyone who wants to dictate control in PvP. Lore: Graoohos’ Closest friend in the Imperial legions also became a Demon. The Shadow God demanded each prove their loyalty by killing the other. Gracchos won. His prize? His comrade’s skull, burning with Anathraad’s flames.
Gilded Pinion
Wearer receives 1% less damage for each turn of cooldown on all their skills. Level 2: Damage Reduction +0.25% Level 3: Damage Reduction +0.25% Level 4: Damage Reduction +0.25% Level 5: Damage Reduction +0.25% Level 6: Damage Reduction +0.50% Stats: 6120 HP, 12 SPD, 28 RES Guide: Gilded Pinion may not grab attention at first glance, but its A-Tier performance makes it a reliable safeguard for unbooked champions in Faction Wars or Cursed City. By offering steady damage reduction and balanced stats, it ensures fighters like Authoratrix Lamasu and Ursala the Mourner can survive long enough to matter. It is practical, effective, and often the quiet difference between clearing content and getting wiped. Lore: A wing shorn from the back of Leminisi Gold-wing. Even separated from her, it radiates holy light and burns with her passion for Teleria and the Mistwood. To possess it is to receive boons uncounted.
Grail of Agony
When enemies steal or decrease the wearer’s Turn Meter, the wearer instead loses 2% MAX HP for every 1% Turn Meter that would have been lost or stolen. Can kill the wearer. Level 2: Lost MAX HP -0.2% Level 3: Lost MAX HP -0.2% Level 4: Lost MAX HP -0.2% Level 5: Lost MAX HP -0.2% Level 6: Lost MAX HP -0.3% Stats: 6120 HP, 204 DEF, 6 SPD Guide: Grail of Agony is a cautionary relic that sits in C-Tier, doing little more than hastening your defeat against powerhouses like Armanz. The HP drain is punishing and almost impossible to offset without extreme investment, making it more liability than asset. It promises gain through pain but more often delivers only regret. Lore: Death is too good for some, so says Tholin Foulbeard. Some must know pain beyond that for their deeds. So he forged a chalice of dark iron laced with curses of agony, the skulls of the deserving placed within.
Gaze of Damnation
Wearer deals 2% more damage per skill activated (stacks up to 10%) and receives 1% less damage per skill not activated (stacks up to 5%) by enemies under [Fear] or [True Fear] debuffs. Level 2: Max Damage Modifier +2% / +1% Level 3: Max Damage Modifier +2% / +1% Level 4: Max Damage Modifier +2% / +1% Level 5: Max Damage Modifier +2% / +1% Level 6: Max Damage Modifier +2% / +1% Stats: 96 ACC, 21% C.DMG, 104 ATK Guide: Gaze of Damnation earns its B-Tier rank by rewarding patient players who can consistently land Fear or True Fear effects. It takes time to gather momentum, but once champions like Embrys the Anomaly, Ma’Shalled, or Timit the Fool get rolling, the payoff becomes noticeable. While situational and useless against many bosses, it shines when conditions are right. Lore: Screaming, burning visages crafted in the forge-pits of Anathraad. Made from ever-burning fire-steel and the faces of Demons who plot against Kurosa the Covetous, they sit atop her banners, warning those who would usurp her.
Tempus Morbidia
Decrease and Steal Turn Meter effects are 15% less effective against the wearer. Level 2: TM Reduction & Steal -3% Level 3: TM Reduction & Steal -3% Level 4: TM Reduction & Steal -3% Level 5: TM Reduction & Steal -3% Level 6: TM Reduction & Steal -3% Stats: 6120 HP, 204 ATK, 104 DEF Guide: Tempus Morbidia sits at a disappointing F-Tier and is best treated as fodder for stronger relics. Its design feels uninspired, and until it receives a buff it holds little strategic value. Keeping one copy on hand is the most you will ever need. Lore: Time itself flickers and folds around this staff ornament of bewitched flame-copper. The flow of minutes and seconds slows for those who wield it, rendering enemy strikes easy to avoid. A gift of Kurosa the Covetous to the favored.
Sinner’s Cloak
Wearer receives 1% DEF for each 15% HP missing (stacks up to 75% missing HP) Level 2: DEF +1% Level 3: DEF +1% Level 4: DEF +1% Level 5: DEF +1% Level 6: DEF +1% Stats: 6120 HP, 204 DEF, 28 RES Guide: Sinners’ Cloak drifts into C-Tier, offering tanky PvE champions a modest boost in survivability through damage reduction. Unfortunately, it falls flat in PvP where Ignore Defence builds run rampant, making it unreliable for competitive play. Solid in long PvE grinds, but forgettable everywhere else. Lore: Time itself flickers and folds around this staff ornament of bewitched flame-copper. The flow of minutes and seconds slows for those who wield it, rendering enemy strikes easy to avoid. A gift of Kurosa the Covetous to the favored.
Discovery Relics
Icon
Relics Description
Stars of the Jiinang
Whenever an enemy’s Turn Meter is increased, the wearer increases their own Turn Meter by 10% of the enemy’s Turn Meter increase. Level 2: Turn Meter Boost +5% Level 3: Turn Meter Boost +5% Level 4: Turn Meter Boost +10% Level 5: Turn Meter Boost +10% Level 6: Turn Meter Boost +10% Stats: 96 RES, 3185 HP, 28 ACC Guide: Stars of the Jiinang earns its SS-Tier status by acting as a game-changing relic for cutting in against arena speed teams. It thrives on generating Turn Meter whenever opponents boost theirs, making it the Turn Meter equivalent of a Supersonic set. Champions like Lord Entertainer Fabian, Marichka the Unbreakable, and Starsage Galathir can use it to punish Arbiter-led teams and flip momentum in your favor. Lore: For Slixus Stripehide, the martial arts of the Jiinang Som were a refuge. Under the guidance of Jiinang magi, he forged these shuriken, blending with the steel blessings to grant the bearer preternatural reflexes and the weapons unerring accuracy.
Xibia’s Servitude
Enemies cannot land critical hits on the wearer if the wearer’s HP is below 15%. Level 2: HP Requirement +5% Level 3: HP Requirement +5% Level 4: HP Requirement +5% Level 5: HP Requirement +5% Level 6: HP Requirement +5% Stats: 398 DEF, 3185 HP, 6 SPD Guide: Xibia’s Servitude takes its place in SS-Tier by providing unparalleled survival potential for tanky arena revivers. It synergizes perfectly with champions that bring self-healing or shielding, making them deceptively hard to take down and giving them the chance to turn fights with a clutch revive. Duchess Lilitu, Starsage Galathir, and Theodosia the Disgraced become especially nightmarish to face when equipped with this relic. Lore: Xibia once advised Losan K’Leth, then turned against him. Few rebels have proven so difficult for him to find and kill. When he finally did so, he kept her skull, imbued as it was with potent protective magic. Now she serves for eternity, sentenced to unwilling Undeath.
Last Laugh Amulet
Wearer has a 30% chance to activate a [Delay] effect when receiving fatal damage. 3 turn cooldown. Level 2: Effect Chance +10% Level 3: Effect Chance +10% Level 4: Effect Chance +10% Level 5: Effect Chance +20% Level 6: Effect Chance +20% Stats: 398 ATK, 3185 HP, 11% C.DMG Guide: Last Laugh Amulet sits in A-Tier, working best when paired with a damage dealer who can be saved from death through an Unkillable or Block Damage buff before the Delay effect triggers. Champions like Sir Nicholas and Arnorn the Shining can benefit from it, though it remains a risky relic. Often the Delay mechanic backfires, leaving your champions vulnerable before they can act. Lore: Painsmith-forged from heavy bronze, glowing eyes of death stare out of this amulet. Present also is a grin, the bless-curse of Loki the Deceiver. A boon enough to save one from death, but cursed so this delay is darkly temporary.
Mask of Disquiet
Wearer has a 30% chance of activating an [Instant Turn] effect on themselves after returning from [Sheep]. Level 2: Effect Chance +10% Level 3: Effect Chance +10% Level 4: Effect Chance +10% Level 5: Effect Chance +20% Level 6: Effect Chance +20% Stats: 96 RES, 204 DEF, 6 SPD Guide: Mask of Disquiet earns an A-Tier placement for its ability to give champions a second chance if they get Polymorphed by a reflected Wand of Submission. It’s most effective on champions like Armanz the Magnificent and Lady Noelle, but its niche use makes it less appealing compared to simply running a Wand of Submission yourself. Lore: Lord Entertainer Fabian’s mask collection is unparalleled. But he will not wear this one – a gift from an anonymous individual. The accompanying message claimed it offered ‘protection from the malignant and debilitating’. Fabian does not trust it.
Exuzar’s Totem
Wearer’s Turn Meter increases by 10%, whenever an ally receives a [Stun], [Sleep], [Fear], [True Fear], [Freeze], [Provoke], or [Petrification] debuff. Occurs once per turn. Level 2: Turn Meter Boost +2% Level 3: Turn Meter Boost +2% Level 4: Turn Meter Boost +2% Level 5: Turn Meter Boost +2% Level 6: Turn Meter Boost +2% Stats: 96 ACC, 3185 HP, 6 SPD Guide: Exuzar’s Totem sits in B‑Tier, excelling in Arena against disruptive champions who apply crowd‑control debuffs (e.g. Fear, Stun, Freeze). Its Turn Meter boost triggers whenever allies are locked down, making it a strong counter to control‑heavy teams. The Totem is best equipped on cleansers or ailment‑resistant champions like Mithrala Lifebane or Uugo, who can strip debuffs and immediately capitalize on the extra Turn Meter. While not as powerful as higher‑tier relics, it’s a reliable budget option for countering CC strategies. Lore: ‘Bone of a foe, blade of a friend, bring good warning of future’s bend.’ – so says the necromancer Exuzar the Foresighted, who fashioned this macabre totem and travels everywhere with it.
Saint Zavier’s Tribute
Wearer has a 15% chance of placing a [Veil] buff on themselves for 1 turn at the end of their turn. The chance increases by 5% for each 15% HP lost. Level 2: Effect Chance +5% Level 3: Effect Chance +5% Level 4: Effect Chance +5% Level 5: Effect Chance +5% Level 6: Effect Chance +5% Stats: 398 ATK, 51 ACC, 11% C.DMG Guide: Saint Zavier’s Tribute lands in B-Tier, designed for champions who rely heavily on Veil to function. It’s particularly valuable on Candraphon and offers situational utility against Hydra’s Head of Torment, but outside of those scenarios its effectiveness is quite limited. Lore: Yakai’s rejection of the Sacred Order has not stopped missionaries from coming to the kingdom. The martyred Saint Zavier remains the most famous. His followers stick to the shadows, safeguarding his treasures and spreading his message.
Thunderous Circlet
Wearer has a 20% chance of placing a 15% [Continuous Heal] buff on themselves for 1 turn after losing 25% or more of their MAX HP. Level 2: Effect Chance +10% Level 3: Effect Chance +5% Level 4: Effect Chance +5% Level 5: Effect Chance +5% Level 6: Effect Chance +5% Stats: 6120 HP, 204 DEF, 28 RES Guide: Thunderous Circlet is a C-Tier relic, primarily serving as fodder to empower stronger ones. While it may offer some limited value for niche solo champions, relics like Golden Elixir overshadow it in nearly every scenario. It’s worth holding onto a single copy, but nothing more. Lore: A crown of lightning-iron, pronged and malicious. The brainchild of Deliana, mistress of tempests. Within is contained the power of an Irethi thunderstorm, capable of breaking spells directed at the wearer and re-knitting damaged flesh.
Jaws of Hatred
When attacked, wearer has a 10% chance of increasing their DEF by 10% until the end of their next turn. Occurs once per skill. Level 2: Effect Chance +5% Level 3: Effect Chance +5% Level 4: Effect Chance +5% Level 5: Effect Chance +5% Level 6: Effect Chance +5% Stats: 398 DEF, 3185 HP, 28 RES Guide: Jaws of Hatred sits firmly in F-Tier, providing no real strategic value and best used solely as upgrade material for more impactful relics. It’s not worth investing resources into under any circumstance. Lore: An heirloom pendant of cursed bronze, sacred to the Deathmaw Orc clan. These denizens of the Stormwind Wastes worship Demons and Darkness, and in return they are granted boons of protection.
Wings of Winter Relics
Icon
Relics Description
Diabolical Dice
Wearer has a 50% chance of increasing a random skill’s cooldown by 2 turns before attacking a single target. Occurs once per turn. Wearer also deals 3% more damage for each turn of cooldown remaining on all enemy skills. Level 2: Effect Chance +10% Level 3: Effect Chance +10% Level 4: Effect Chance +10% Level 5: Effect Chance +10% Level 6: Effect Chance +10% Stats: 398 ATK, 51 ACC, 11 C.DMG Guide: Diabolical Dice earns its SS-Tier Mythical status as one of the most oppressive PvP damage relics in the game, perfectly suited for arena nukers who invest into Accuracy. It delivers massive damage boosts while also locking out enemies, making it especially deadly against reviver teams by preventing comebacks after a successful AoE wipe. Champions like Alice the Wanderer, Galleus Bloodcrest and Marius the Gallant gain exceptional value from this relic, turning raw damage into decisive wins. However, its strength is conditional where without sufficient ACC, its defining effect fails to trigger, making proper stat allocation essential. Lore: Not chance but wicked sentience drives these dice. On a whim they bring fabulous luck or terrible misfortune to their owners. Nari the Lucky and Karnage the Anarch both curse their name.
The Towerhelm
Wearer receives a 25% [Fortify] buff for 2 turns at the start of each Round. Ignore DEF effects used against the wearer are 10% less effective when the wearer’s HP is less than 50%. Level 2: Ignore DEF Reduction +5% Level 3: Ignore DEF Reduction +5% Level 4: Ignore DEF Reduction +10% Level 5: Ignore DEF Reduction +10% Level 6: Ignore DEF Reduction +10% Stats: 24 SPD, 204 DEF, 1662 HP Guide: The Towerhelm is an SS-Tier Mythical relic built for high-RES, tanky PvP champions who can survive at low HP. When fully upgraded, it provides powerful damage mitigation below 50% HP, functioning similarly to Harima’s passive, but only if the wearer is durable enough to stay alive in that danger zone. Its opening Fortify buff adds early protection, though it is not protected and can be stripped, making high Resistance mandatory. Champions like Marichka the Unbreakable, Starsage Galathir, and Theodosia the Disgraced the Disgraced benefit most, with the Speed main stat being a major highlight. Lore: Fashioned for the Lord of Ironkeep generations ago. Since the foundation of Kaerok has that family, named for their impregnable castle, been loyal to the crown. Their word is as unbreakable as their walls.
Thunderbolt Spear
Wearer deals 10% more damage to enemies under [Shield] buffs. Level 2: Damage +5% Level 3: Damage +5% Level 4: Damage +5% Level 5: Damage +5% Level 6: Damage +10% Stats: 40% C.DMG, 204 ATK, 104 DEF Guide: Thunderbolt Spear is an A-Tier Legendary relic designed for PvP nukers who regularly face shield-heavy teams. It excels on champions who ignore Shields, allowing them to capitalize on its damage boost without being slowed down by defensive setups. Supreme Elhain and Wight King Narses are prime examples of champions who can make effective use of this relic. While it lacks the oppressive utility of Mythical relics, it remains a strong and reliable offensive option in the right matchups. Lore: Lightning-blessed by Odin Faefather, the weapon of a long-dead follower slain in the War of Kaerok. For centuries has it gathered dust in an empty hall of Asgard.
Removes all debuffs from the wearer whenever they lose 70% or more HP from damage by an enemy in a single turn. Level 2: HP Requirement -5% Level 3: HP Requirement -5% Level 4: HP Requirement -10% Level 5: HP Requirement -10% Level 6: HP Requirement -10% Stats: 96 RES, 12 SPD, 1662 HP Guide: Okulos Kustodion sits comfortably in A-Tier as a Legendary relic for high-RES PvP champions dealing with unresistable debuffs. Its main appeal lies in its solid gem slots and Speed secondary stat, making it one of the better Resistance-focused relics available. That said, its effect is relatively modest, as champions stacking heavy RES already aim to resist most threats. As a result, it functions more as a high-quality stat relic than a game-changing effect piece. Lore: Unidentifiable is the malignant, tentacled creature bound with this amulet, born of the Dance of Darkness. A vile creature, it hurls abuse at anyone nearby, whether cruel, cutting mockery or truly evil curses.
Howling Guardians
Decreases the damage the most injured ally receives from Bosses by 5%. Wearer receives that damage instead. This Relic will only activate once per team. Level 2: Damage Reduction +3% Level 3: Damage Reduction +3% Level 4: Damage Reduction +4% Level 5: Damage Reduction +5% Level 6: Damage Reduction +5% Stats: 398 DEF, 3185 HP, 28 RES Guide: Howling Guardians is a B-Tier Epic relic that offers situational value in PvE content like Clan Boss and Faction Wars by redirecting damage to protect fragile damage dealers. It performs best on naturally tanky champions, with Krisk being a standout option due to his durability. Careful planning is required, as the wearer must be able to withstand the extra damage intake for the relic to provide consistent value. Lore: The wolf-brothers are legendary, sung of around many Deadland Raider fires. Inseparable, loyal, the greatest protectors of the Sand Moon Clan and also each other.
Darksmile’s Toast
Whenever the wearer’s Turn Meter is filled by a skill, also heals the wearer by 3% of their MAX HP. Occurs once per turn. Level 2: Heal +1% Level 3: Heal +1% Level 4: Heal +1% Level 5: Heal +2% Level 6: Heal +2% Stats: 6120 HP, 51 ACC, 6 SPD Guide: Darksmile’s Toast is a niche B-Tier Epic relic intended for PvE solo strategies that rely heavily on Turn Meter manipulation. Champions with multiple Turn Meter boosting skills can use it to maintain momentum and sustain over long fights. While its applications are limited, it’s worth keeping a copy for specialized builds or future content that rewards extreme turn cycling. Lore: With a cry of ‘oh I know where this story goes’, and a wicked laugh, Komidus Darksmile quaffs this potion. He blows away his foes with the overwhelming vitality it gives him, bringing them to tears.
Vigor Mortis
Wearer deals 2% more damage to enemies whose MAX HP is at least double the wearer’s MAX HP. Level 2: Damage +1% Level 3: Damage +1% Level 4: Damage +1% Level 5: Damage +1% Level 6: Damage +2% Stats: 398 ATK, 204 DEF, 11% C.DMG Guide: Vigor Mortis is a C-Tier Rare relic that serves as a solid budget choice for ATK-based PvE damage dealers. It offers straightforward value without any complex mechanics, making it useful early on but easily replaceable once Epic or Legendary relics become available. Lore: A toxic husk of decayed, cursed wood. A remnant of the sick extremes of Maximoz’s experiments. When its wielder holds it aloft, those caught beneath its withering gaze feel both armor and skin melt.
Sigil of the Akar
Wearer receives 2% less damage from enemies whose MAX HP is at least double the wearer’s MAX HP. Level 2: Damage Reduction +1% Level 3: Damage Reduction +1% Level 4: Damage Reduction +1% Level 5: Damage Reduction +1% Level 6: Damage Reduction +2% Stats: 6120 HP, 204 DEF, 28 RES Guide: Sigil of the Akar is a C-Tier Rare relic designed as a budget option for PvE support champions, particularly in boss encounters. Its impact is modest and largely stat-based, making it a temporary placeholder rather than a long-term solution, but still serviceable for players lacking higher-rarity alternatives. Lore: Long gone are the Akar people, the subjects of Nekhret, their bones scattered in shifting sands. But their magic lives, ever potent. Keen hunters of giant desert predators, sigils of protection were their specialty.
Faction Wars Relics
The Faction Wars Relics represent a core group of 8 essential relics, comprising 2 Rare, 2 Epic, 2 Legendary, and 2 Mythical artifacts. These relics are a key component of every player’s collection. Unlike other types of relics, they require specific crafting materials, which can be earned by completing Faction War stages daily and then forged in the Forge. As the second most plentiful type of relic, they play a crucial role in late-game progression and remain valuable throughout your adventure. This ensures that all players have access to a dependable and adaptable set of tools to strengthen their champions.
Icon
Relics Description
Torch of Thralldom
Wearer has their stats increased by 1% per each ally from the same Faction. Level 2: Stat bonus +0.5% Level 3: Stat bonus +0.5% Level 4: Stat bonus +0.5% Level 5: Stat bonus +1% Level 6: Stat bonus +1.5% Stats: 6120 HP, 204 DEF, 104 ATK Guide: Torch of Thralldom is an SS-Tier relic built to supercharge Faction Unity teams, stacking huge stat gains when you field a full lineup from the same faction. Damage dealers especially shine under its power, making it a brutal option for coordinated setups. Champions like Lady Mikage, Legate Teox, and Tetsuya the Deliverer can transform entire battles when paired with this relic, overwhelming enemies through raw faction synergy. Lore: All-consuming is the flame of this torch, not just of flesh, but of worship. It is the creation of Xavial, vampire of the Deadlands. His cult is widespread and possesses great numbers, bringing meat and blood to him.
Mind of Marquat
Wearer has a 25% chance of placing a [Fatigue] debuff for 1 turn with each hit. Level 2: Effect Chance +5% Level 3: Effect Chance +5% Level 4: Effect Chance +5% Level 5: Effect Chance +10% Level 6: Effect Chance +10% Stats: 96 ACC, 12 SPD, 1662 HP Guide: Mind of Marquat is an S-Tier relic that thrives in Live Arena, where its Fatigue debuff creates chaos by shutting down enemy plays and catching opponents off guard. Since it does not show up in Draft, rivals often struggle to prepare for its tricky mechanics, giving you the edge if you know how to manage sleep effects carefully. Champions like Lord Entertainer Fabian, Tormin the Cold, and Warlord are excellent users of this relic, locking down enemy strategies while punishing any missteps. Lore: Losan K’Leth has many uses for his servants. One advisor, Marquat, bored him so much he weaponized her monotony. Her remains now reside in this steel contraption, her amplified brainwaves able to send a glass.
Eternal Soulgaol
The first hit received by the wearer from each enemy in a Round will deal 10% less damage. Each subsequent hit from each enemy that Round will deal 5% less damage. Level 2: Damage Reduction +5% / +1% Level 3: Damage Reduction +5% / +1% Level 4: Damage Reduction +5% / +1% Level 5: Damage Reduction +5% / +1% Level 6: Damage Reduction +10% / +1% Stats: 6120 HP, 204 ATK, 11% C.DMG Guide: Eternal Soulgaol secures an A-Tier rating, excelling in Arena, Siege, Faction Wars, and Cursed City where durability is key. Its strong damage mitigation makes it ideal for shorter fights, helping champions like Marichka the Unbreakable and Ultimate Deathknight shrug off bursts of damage and keep the frontline steady. Lore: Tortured, shrieking souls are bound to this accursed lamp. They each sold their essence to a Knight Revenant necromancer to preserve their existence, and now they are nothing but spectral shields and playthings.
The Collective
Wearer deals 1% more damage per buff on them. Removes all buffs from the wearer at the end of each turn. Level 2: Damage +0.5% Level 3: Damage +0.5% Level 4: Damage +0.5% Level 5: Damage +0.5% Level 6: Damage +2% Stats: 40% C.DMG, 3185 HP, 6 SPD Guide: The Collective lands in the B-Tier, offering a tremendous boost for Arena nukers who aim to wipe enemies in a single strike. Paired with buff-heavy comps, it allows champions like Sun Wukong and Leorius the Proud to unleash devastating power. However, its drawback leaves the wielder dangerously exposed if the enemy survives, making it risky outside of a perfectly timed one-shot strategy. Lore: Heads of hags declared witches and killed. Made Undead conduits for necromantic power by their collector. Their jabber of old grudges, nonsense potions, and ancient curses is constant. Stapled lips cannot stop them.
Hammer of Ending
Wearer has a 15% chance to place an unresistable [Stun] debuff on a single target for 1 turn whenever they reduce a target’s HP by 30% or more with a single skill. Level 2: Effect Chance +5% Level 3: Effect Chance +5% Level 4: Effect Chance +5% Level 5: Effect Chance +5% Level 6: Effect Chance +5% Stats: 6120 HP, 204 ATK, 11% C.DMG Guide: Hammer of Ending is a B-Tier relic that finds its best value in Doom Tower Secret Floors, Faction Wars or Cursed City, where enemies tend to survive long enough for its Stun to shine. Though it rarely beats raw damage output, champions like Elhain and Magnarr can leverage its control potential to keep battles under your command. Lore: Depraved and heinous are the Painsmiths’ engines. Only cursed tools infused with fell power can be used to fashion the arcane machines. With this hammer, Sirothi Dwarves craft evil and deal death in the name of their god.
Perched Shadow
Wearer has a 10% chance to receive an Extra Turn when using their default skill, if at least 1 active skill is on cooldown. Level 2: Extra Turn Chance +2% Level 3: Extra Turn Chance +2% Level 4: Extra Turn Chance +2% Level 5: Extra Turn Chance +2% Level 6: Extra Turn Chance +4% Stats: 6120 HP, 204 DEF, 6 SPD Guide: Perched Shadow earns an S-Tier rating as a versatile relic that brings a burst of unpredictability to long fights. Acting like a mini Relentless set, it empowers support champions and HP-based damage dealers alike, smoothing out its randomness over time for consistent advantage. Champions such as Elva Autumnborn, Lady Mikage, and Lydia the Deathsiren benefit greatly, turning it into a powerhouse relic for sustained fights. Lore: Depraved and heinous are the Painsmiths’ engines. Only cursed tools infused with fell power can be used to fashion the arcane machines. With this hammer, Sirothi Dwarves craft evil and deal death in the name of their god.
Arachnelixir
Wearer’s [Poison] debuffs deal bonus damage equal to 50% of the wearer’s ATK. Level 2: Damage +20% Level 3: Damage +20% Level 4: Damage +20% Level 5: Damage +20% Level 6: Damage +20% Stats: 398 ATK, 3185 HP, 28 ACC Guide: Arachnelixir sits firmly in SS-Tier as one of the most overtuned relics in the game, transforming Poison damage into a devastating win condition for the right champions. Its power lies in amplifying every Poison tick, multiplying their impact to the point where a well-built Poisoner can melt through Arena teams with ease. This relic is especially deadly when paired with the Lethal Dose blessing, creating a compounding effect that can deliver shocking amounts of damage. Champions like Balar the Lost, Kalvalax, and Nell Blackteeth thrive with this relic, turning their Poison-heavy kits into unstoppable weapons of attrition. Lore: Sizzling venom fresh from the fangs of the Spider Queen. A single drop can melt a face, a breath of its fumes can torch lungs. Thirty of Teodor’s thralls died to collect a single vial. A good price.
Codex Luminis
Wearer receives 5% less damage from Champions that have a different Affinity. Level 2: Damage Reduction +1% Level 3: Damage Reduction +1% Level 4: Damage Reduction +1% Level 5: Damage Reduction +1% Level 6: Damage Reduction +1% Stats: 6120 HP, 204 DEF, 28 RES Guide: Codex Luminis sits in the C-Tier, offering a simple but useful layer of protection when tackling negative affinity Dungeons or Clan Bosses during progression. While not flashy, its damage reduction can help keep your team alive long enough to secure victory, making it a safe but unspectacular relic to keep in your collection. Lore: Golden, restorative light radiates from this aged tome. But only for the pure. Written upon its pages in fine hand are prayers and hymns of staggering power. A whole cathedral was built to house it, heavily guarded.
Grim Forest Relics
The Grim Forest Relics represent a core group of 8 essential relics, comprising 2 Rare, 2 Epic, 2 Legendary, and 2 Mythical artifacts. These relics are a key component of every player’s collection. Unlike other types of relics, they require specific crafting materials, which can be earned by completing Grim Forest stages daily and then forged in the Forge. As the second most plentiful type of relic, they play a crucial role in late-game progression and remain valuable throughout your adventure. This ensures that all players have access to a dependable and adaptable set of tools to strengthen their champions.
Icon
Relics Description
Lens of Intangibility
Wearer ignores 10% of a target’s DEF. At the start of a Round, places a [Perfect Veil] buff on the wearer for 2 turns. While under [Veil] or [Perfect Veil], wearer ignores an additional 5% DEF. Level 2: Ignore DEF +3% Level 3: Ignore DEF +3% Level 4: Ignore DEF +3% Level 5: Ignore DEF +3% Level 6: Ignore DEF +3% Stats: 24 SPD, 204 ATK, 28 ACC Guide: Lens of Intangibility stands at the very top of the relic hierarchy as an SS-Tier Mythical relic, widely regarded as the strongest pure damage amplifier in the game when used correctly. It excels on damage dealers who can consistently benefit from Perfect Veil, allowing them to push their Ignore DEF to devastating levels without exceeding the 100% cap. Champions like Marius the Gallant, Ninja and Predator gain enormous value from this relic, turning already lethal kits into fight-ending threats. While champions unable to self-apply Perfect Veil require team support to unlock its full power, the damage payoff is unmatched, making this relic the gold standard for endgame nukers. Lore: A creation of Dark Elf assassins, a lens by which — should one be close enough — one can see a target at their weakest moment. With the utterance of dark wishes, it will launch its bearer and their readied blade, to the vulnerable, unsuspecting foe’s side.
Coronet of Gloom
When all the wearer’s allies are dead, places a [Block Damage] on the wearer for 1 turn. Has a 10% chance of placing this buff when a single ally dies. Level 2: Effect Chance +5% Level 3: Effect Chance +5% Level 4: Effect Chance +5% Level 5: Effect Chance +5% Level 6: Effect Chance +5% Stats: +40% C.DMG, 3185 HP, 6 SPD Guide: Coronet of Gloom is an SS-Tier Mythical relic that masterfully blends high damage output with exceptional survivability, making it a premier choice for damage dealers who also bring revive mechanics. Its strength lies in allowing champions like Nais the Shadowthief, Hierophant Lazarius, and Yukimasa Demon of Ice to stay relevant even under extreme pressure, especially in difficult PvE encounters or prolonged PvP fights. The added defensive value ensures that revivers can safely return allies to the fight while still contributing meaningful damage, cementing this relic as one of the most well-rounded offensive options available. Lore: Leshun the Entangled One is the greatest guardian of the Gloom Lands. Those who don the crowns of his fashioning are blessed with his protection, but in exchange they grant him control over all their actions forever more.
Soulmar Crystal
Once per Round, wearer has a 50% chance of activating an [Instant Turn] effect when one or more allies are killed. Level 2: Effect Chance +10% Level 3: Effect Chance +10% Level 4: Effect Chance +10% Level 5: Effect Chance +10% Level 6: Effect Chance +10% Stats: 6120 HP, 12 SPD, 28 RES Guide: Soulmar Crystal is a Legendary A-Tier relic designed for PvP-focused revivers who can swing momentum with a single revive. It shines brightest on champions such as Raglin and Theodosia the Disgraced, particularly when their revive skills grant Turn Meter boosts or powerful effects like Block Damage or Unkillable. While its impact is more situational than Mythical options, it can decisively punish careless opponents or rescue a collapsing battle, making it a clever and often underestimated choice for competitive PvP and select Faction Wars scenarios. Lore: A failed experiment of Maximoz the Weeping Blade, the dreaded soulmar bound in crystal. Abandoned by the immiserated Lightbringer, recovered by the creeping tendrils of the Gloom Lands itself.
Sporeburst Rod
Whenever the wearer places a [Poison] or [Bomb] debuff, has a 10% chance of placing a second debuff for 2 turns. Only counts debuffs placed by active skills. Level 2: Effect Chance +5% Level 3: Effect Chance +5% Level 4: Effect Chance +5% Level 5: Effect Chance +5% Level 6: Effect Chance +5% Stats: 96 ACC, 204 ATK, 1662 HP Guide: Sporeburst Rod earns its A-Tier Legendary status by being the only relic in the game that directly enhances Bomb mechanics, making it indispensable for Bomb specialists like Gnishak Verminlord and Kroz Wallbreaker. Its ACC-to-ATK stat conversion aligns perfectly with Bomb champions’ needs, allowing them to land debuffs reliably while scaling damage efficiently. Although Poison champions can use it reasonably well, they have access to stronger alternatives, leaving Sporeburst Rod as a near-mandatory pick for Bomb-centric builds. Lore: Fungi of the Gloom Lands possess a dread, predacious sentience. Those with bioluminescent powers lure mortals to items of their own creation, sinking mycelia beneath their skin and taking over their minds — all to spread their spores ever further.
Compass of Anaxia
Whenever the wearer is under a crowd control debuff, all Turn Meter fill effects increase the wearer’s Turn Meter by an additional 20%. Level 2: Turn Meter Increase +10% Level 3: Turn Meter Increase +10% Level 4: Turn Meter Increase +10% Level 5: Turn Meter Increase +25% Level 6: Turn Meter Increase +25% Stats: 96 RES, 3185 HP, 6 SPD Guide: Compass of Anaxia is a B-Tier Epic relic aimed at high-RES revivers and support champions, with Wight Queen Ankora being a prime example. While its effect itself is fairly modest, the relic compensates with solid base stats and useful gem sockets that support resistance-heavy builds. It serves as a functional option for players building resilient supports for PvP or PvE content, though it is rarely a long-term endgame solution compared to higher-tier relics. Lore: Product of the finest Twinrift cartomancers and navimagi, this compass was carried by Grand Nautilon Anaxia on the fateful journey which saw her shipwrecked upon the Gloom Lands. For all its magic, it could not save her.
Revolting Seedling
Whenever the wearer receives damage, has a 20% chance to heal themselves by 20% of the damage received. Level 2: Effect Chance +5% Level 3: Effect Chance +5% Level 4: Effect Chance +5% Level 5: Effect Chance +5% Level 6: Effect Chance +10% Stats: 6120 HP, 204 DEF, 28 RES Guide: Revolting Seedling is a C-Tier Epic relic intended as a budget survivability option for champions you simply need to keep alive. It works adequately on tanky champions like Vogoth, providing basic defensive value without excelling in any specific area. While it lacks the impact and efficiency of stronger relics, it functions as a serviceable placeholder until better options become available. Lore: The gloomberry tree’s name makes it sound malign enough. Its seedlings make it worse — each explosive, filled with stinking, sticking sap. Yet, treated appropriately, this vomit-inducing substance makes for an effective balm.
Steel-Eyed Cutter
Wearer has a 20% chance to ignore 5% of an enemy’s DEF when attacking. Level 2: Effect Chance +5% Level 3: Effect Chance +5% Level 4: Effect Chance +5% Level 5: Effect Chance +5% Level 6: Effect Chance +10% Stats: 398 ATK, 21% C.DMG, 28 ACC Guide: Steel-Eyed Cutter is a C-Tier Rare relic that currently stands as the best budget damage option for ATK-based nukers. Suitable for any ATK/Crit damage dealer, it fills an important gap for early- to mid-game players who lack access to stronger relics. It is especially valuable when Malefic Talon is reserved for HP-based damage dealers, allowing ATK nukers to maintain respectable damage output without heavy investment. Lore: Once a blade borne by a storied knight of Kaerok, bled on dozens of battlefields. Lost in the Bay of Thorns untold years ago, now twisted and mutated beyond all recognition. Agony and fury both can be seen in its many eyes.
Hoarder’s Cauldron
Wearer has a 20% chance to ignore 10% of the target’s RES, when applying debuffs. Level 2: Effect Chance +5% Level 3: Effect Chance +5% Level 4: Effect Chance +5% Level 5: Effect Chance +5% Level 6: Effect Chance +10% Stats: 96 ACC, 3185 HP, 104 DEF Guide: Hoarder’s Cauldron is a C-Tier Rare relic that offers a straightforward ACC boost for debuff-focused champions. It works universally on any debuffer and can even be used by champions that simply need extra Accuracy to function. While it is firmly a filler option, it remains highly practical for early and mid-game progression, bridging the gap until more powerful Legendary or Mythical relics are obtained. Lore: This cauldron is ever hot and bubbling with molten gold. From any of its eyes Phrygius the Trovemaster can see potential thieves, and within Phrygius boils them alive after he has seized them.
Forge Pass Relics
The Forge Pass Relics represent an exclusive tier of 8 high-powered artifacts, comprising 2 Rare, 2 Epic, 2 Legendary, and 2 Mythical pieces, crafted through materials earned via the Platinum Forge Pass tier, select events, and future tournaments. These relics distinguish themselves from Standard variants with their superior strength and rarity, yet their acquisition hinges on a premium path: currently, the Platinum Pass offers 200 Rare and Epic fragments, 100 Legendary fragments (with only a 40% chance to craft a true Legendary), and 1000 Starstone, primarily through real-money purchases. For new players, this investment can accelerate progress significantly, but veterans may deem it a luxury due to inconsistent rewards and the temporary absence of Mythical fragments, though developers hint at broader availability in upcoming updates. Community response to the inaugural Platinum Pass has spurred expectations for refined accessibility and crafting reliability, positioning these relics as both a coveted challenge and a strategic gamble for optimizing late-game champion builds.
Icon
Relics Description
Dreadbomb
Wearer has a 10% chance to gain an Extra Turn when attacking. Wearer also ignores 10% of an enemy’s DEF when attacking during Extra Turns. Level 2: Effect Chance +2% Level 3: Effect Chance +2% Level 4: Effect Chance +2% Level 5: Effect Chance +2% Level 6: Effect Chance +2% Stats: 40% C.DMG, 12 SPD, 104 ATK Guide: Dreadbomb explodes onto the scene as an SS-Tier powerhouse, recognized as the ultimate relic for raw damage and arena dominance. It shines brightest when placed on champions who thrive on high critical damage and speed, with its unique three Triangle gemslots delivering unmatched offensive potential. While it trades the option to stack multiple Boss Slayer Circular gems, the payoff is extraordinary for those who want their nuker to end fights in a single sweep. Champions like Marius the Gallant, Rotos the Lost Groom, and Siegfrund the Nephilim all elevate their killing power when paired with this relic, especially when combined with a Merciless set or abilities that grant extra turns. Lore: Masterwork of Bommal following his seizure and breaking by Siroth. Once detonated, this arcano-meohanioal explosive unleashes bone-shattering and organ-liquefying shookwaves that throw foes from their feet — if they are not slain first.
Immortal Visage
Once per Round, wearer is revived with 50% HP and 50% Turn Meter. Level 2: HP & Turn Meter +10% Level 3: HP & Turn Meter +10% Level 4: HP & Turn Meter +10% Level 5: HP & Turn Meter +10% Level 6: HP & Turn Meter +10% Stats: 24 SPD, 3185 HP, 104 DEF Guide: Immortal Visage stands tall as an SS-Tier relic, giving defensive titans the staying power to outlast even the fiercest arena assaults. With speed as the premier main stat and the hidden ace of a full Turn Meter revive, this relic flips the script when foes think they have secured victory. The surprise factor alone makes it priceless, and once it triggers, the momentum is firmly back in your hands. Champions like Marichka the Unbreakable, Starsage Galathir, and Theodosia the Disgraced thrive with this relic, turning into unshakable anchors who keep their teams alive and winning. Lore: Extracted from a deep cavern in the Stormwind Wastes, a trio of unblinking, pit-like eyes staring up. Gazing into its oculi created obsession with it; donning it grants one the feeling of life renewed. But at what cost?
Bane of Sintranos
Whenever an enemy receives a buff, the wearer has a 15% chance of getting the same buff for 2 turns. Occurs once per turn. Level 2: Effect Chance +3% Level 3: Effect Chance +3% Level 4: Effect Chance +3% Level 5: Effect Chance +3% Level 6: Effect Chance +3% Stats: 96 ACC, 3185 HP, 104 DEF Guide: Bane of Sintranos lands in A-Tier as a curious relic that rewards quick champions who can cycle turns to reset its cooldown. Its effect can feel hit or miss since copying enemy buffs may hand you Stoneskin or something far less useful, but in the right matchups the upside is game changing. Arena speedsters such as Lord Entertainer Fabian and Odin Faefather are prime candidates to make the most of its unpredictable yet potentially devastating power. Lore: Amius’ jealousy was one of many traits Karnage the Anarch played upon. The Demonspawn wove within this grim spearpoint the power to mirror the magical boons, enchantments, and talents of others.
Blades of Akumori
Whenever an ally is attacked by an enemy, the wearer has a 15% chance of placing a [Provoke] debuff on the attacker for 1 turn. Level 2: Effect Chance +3% Level 3: Effect Chance +3% Level 4: Effect Chance +3% Level 5: Effect Chance +3% Level 6: Effect Chance +3% Stats: 96 ACC, 3185 HP, 104 DEf Guide: Blades of Akumori slices into S-Tier with a simple yet devastating strength, empowering champions to provoke waves of enemies in nearly every fight. Its potential multiplies in Faction Wars Hard, where stacking it across several allies can lock down foes turn after turn. Ideal for sturdy warriors who can absorb hits, this relic finds perfect synergy with provokers like Arbais the Stonethorn and Lord Entertainer Fabian, ensuring constant disruption against enemy waves. Lore: Ever-sharp blades of Shogun Akumori, the essence of his warrior-arrogance bound within. Supreme confidence fills the bearer, and they heap as many insults upon their foes as they do soul-shattering slashes and strikes.
The Exile’s Crown
Wearer receives 1% less damage for each debuff on them. Level 2: Damage Reduction +0.5% Level 3: Damage Reduction +0.5% Level 4: Damage Reduction +0.5% Level 5: Damage Reduction +1.0% Level 6: Damage Reduction +1.5% Stats: 96 RES, 3185 HP, 104 DEF Guide: The Exile’s Crown takes a B-Tier spot by offering a straightforward RES boost but struggles with its own counterplay. Since the relic’s bonus scales with debuffs received, building resistance undercuts its full potential. Even so, at peak stacks it provides an impressive damage reduction that can make a champion surprisingly sturdy. Praeva the Slitherer is a fitting choice, benefiting from the stat stick and durability when fights drag out. Lore: Before Malek the Exile was poisoned by Bad-El-Kazar and rendered a paranoid maniac, he was known for his devotion to his teacher, Andromeda. His crown became synonymous with loyalty, a trait now alien to its master.
Andromeda’s Diadem
Whenever the wearer heals an ally with an active skill, has a 10% chance to decrease the cooldown of one of the wearer’s skills by 1 turn. Occurs once per turn. Level 2: Effect Chance +2% Level 3: Effect Chance +2% Level 4: Effect Chance +3% Level 5: Effect Chance +3% Level 6: Effect Chance +5% Stats: 6120 HP, 204 DEF, 6 SPD Guide: Andromeda’s Diadem sits at B-Tier as a highly niche relic designed for champions who pour out healing almost every turn. Its effectiveness hinges on frequency, making it far less useful on those with longer cooldowns or passive heals. For consistent healers like Donatello, however, it offers solid support and makes each restoration ability feel more impactful. Lore: Few teachers in dread Ireth matched Andromeda’s talents, raising students into mighty sorcerers or learned scholars. Lessons she taught were always fresh in their memory, ready to be drawn upon in an instant when needed.
Pyros Malleos
Wearer deals 2% more damage if all allies are alive. Doesn’t work if there are no allies in the battle. Level 2: Damage +1% Level 3: Damage +1% Level 4: Damage +1% Level 5: Damage +1% Level 6: Damage +2% Stats: 398 ATK, 3185 HP, 11% C.DMG Guide: Pyros Malleos claims a C-Tier position as a budget-friendly relic for damage dealers. It cannot compete with higher rarity options, but its accessibility and ease of use give it a role for developing rosters. Michelangelo benefits well, finding in it a serviceable placeholder until stronger gear takes its place. Lore: A Dark-aetheric forcefield hums from this hammer, protecting the bearer from the most ferociously hot of Anathraad’s forges. Its genius maker is now long-forgotten, relegated to the edge of Demonic society by Mortu-Macaab.
Frostspawn Cocoon
Wearer is healed by 2% of their MAX HP when using their default skill. Level 2: Heal +1% Level 3: Heal +1% Level 4: Heal +1% Level 5: Heal +1% Level 6: Heal +2% Stats: 6120 HP, 204 DEF, 28 RES Guide: Frostspawn Cocoon lands in C-Tier yet still has value for creative setups, especially in solo runs or with champions that thrive on counterattacks and ally strikes. While not a top pick for advanced accounts, it adds survivability and consistency to teams still climbing the ranks. For turtle-like defenders it is a natural fit, keeping them alive through thick and thin. Lore: The creature Sorath is a great spider of ice and malice. Her powers are those of the Firstborn, the Waters of Life, and Anathraad, a primordial combination with which she can spawn diminutive clones of herself.
List of Gemstones (Standard Group)
Circular Gemstones (Standard Group)
Circular Gemstones are hybrid PvE and PvP enhancements — they bridge offensive Boss and Dungeon damage with crowd-control ACC and RES bonuses, stacking buffs on kills, and turn-meter utilities. Best for flexible champions that move between Boss fights, Dungeons, and Arena where a mix of damage and survivability is needed.
Icon
Gemstone Description
Boss Slayer
The wearer deals 10% more damage to Bosses. Guide: Best on your main damage dealer for Clan Boss, Hydra, and Chimera runs. The +10% applies to every hit on a Boss, so it stacks massively across multi-hit skills and AoE rotations.
Bolstered Defense
Ignore DEF effects are 12% less effective against the wearer. Guide: A must-have for tanks and squishy champions in Arena. Counters Helmsmasher mastery and Savage or Lethal artifact sets, so slot it on any champion that melts to high-DEF-ignore nukers.
Undead Bulwark
Every time the wearer is revived, decreases all incoming damage by 10% (stacks up to 30%). Guide: Best on champions that revive themselves or are revived often. Each revive adds another -10% damage taken, capping at -30% — a huge survivability boost in extended battles.
Bloodthirsty Prowess
Every time the wearer kills an enemy, increases their damage dealt by 10% (stacks up to 30%). Guide: Top pick for wave-clearers in Faction Wars, Dungeons, and AoE Arena teams. The damage bonus stacks to +30% as you mow down enemies, so the longer you survive, the harder you hit.
Puppetmaster
The wearer gains an additional 30 ACC when attempting to place [Stun], [Freeze], [Sleep], [Provoke], [Fear], [True Fear], [Petrification] and [Sheep] debuffs. Guide: Slot on your main debuffers to land Stun, Freeze, Sleep, Provoke, Fear, and Sheep more reliably. The +30 ACC is huge — it is like adding a second ACC roll to every CC attempt.
Uncontrollable
The wearer gains an additional 30 RES against enemies attempting to place [Stun], [Freeze], [Sleep], [Provoke], [Fear], [True Fear], [Petrification] and [Sheep] debuffs. Guide: Pair with Puppetmaster if you have a dedicated CC champion. The +30 RES makes the wearer much harder to crowd-control, ideal for tanks and supports that need to keep their skills flowing.
Explosive Power
[Bomb] debuffs placed by the wearer deal 10% more damage. Guide: Best on champions that apply [Bomb] debuffs. The +10% damage applies to every Bomb tick, so it adds up across multi-Bomb rotations — particularly strong in Boss fights and long encounters.
Dungeon Delver
The wearer deals 10% more damage in Dungeon Battles. Guide: Exclusive to Dungeon content. Slot on your main damage dealer in Dragon, Ice Golem, Fire Knight, and other Dungeons to push faster clears. Skip it for Arena or Clan Boss builds.
Unflinching
Bosses deal 5% less damage to the wearer. Guide: Best on squishy supports or low-HP nukers in Clan Boss, Hydra, and Chimera teams. The -5% damage reduction is small but consistent — every Boss hit matters in long encounters.
Destructive Accuracy
The wearer ignores 5% of the target’s RES when placing [Bomb], [Poison], and [HP Burn] debuffs. Guide: Slot on champions that apply Bomb, Poison, or HP Burn debuffs. The 5% RES ignore helps land these debuffs on high-RES Boss targets, where every percentage of accuracy counts.
Targetfinder
The wearer’s ACC increases by 5 whenever an enemy resists a debuff placed by the wearer (stacks up to 40). Guide: A slow-burn gem for sustained debuff champions. Each resisted debuff adds +5 ACC, capping at +40 — so the more the enemy resists, the harder your next debuff lands.
Foekiller
The wearer deals 5% more damage against enemies with full HP. Guide: Best on opening nukers and wave-clearers. The +5% only applies to enemies at full HP, so it shines in the first wave of a Dungeon or in Arena when the enemy is untouched.
Critical Bolster
The wearer’s DEF increases by 1% each time they receive a critical hit (stacks up to 10%). Guide: Top pick for tanks facing high-crit enemy teams. Each critical hit the wearer takes adds +1% DEF, capping at +10% — a slow but reliable defensive stack in crit-heavy matchups.
Unerring Focus
The wearer’s ACC increases by 3 per each debuff on them. Guide: Best on debuffers that also get debuffed often. The more debuffs the enemy stacks on the wearer, the more ACC the wearer gains — turning enemy pressure into offensive power.
Unstoppable
Turn Meter decrease effects are 10% less effective on the wearer. Guide: Slot on champions that fear TM manipulation. The -10% reduction helps the wearer keep their turn meter in matchups against TM-reduction-heavy teams, ideal for control Arena and certain Boss mechanics.
Invigorated
Turn Meter increase effects are 10% more effective on the wearer. Guide: Best on champions that frequently receive TM from allies or skills. The +10% boost makes every TM fill more impactful, accelerating turn cycles in extended fights.
Diamond Gemstones (Standard Group)
Diamond Gemstones are team-oriented support enhancements — they boost healing, manipulate Turn Meter and SPD through ally actions, strengthen revival mechanics, and scale ACC or RES with team state. Best for supports, healers, and revivers whose role is to keep the team alive and cycling rather than deal raw damage.
Icon
Gemstone Description
Necrodefence
The wearer reduces incoming damage by 10% for each dead ally. Guide: A late-game scaling gem. Each dead ally on the team reduces the wearer’s incoming damage by 10%, so it shines in attrition fights where allies drop and the wearer is the last one standing.
Revival’s Boon
The wearer gains 10% Turn Meter every time they revive an ally. Guide: Best on dedicated revivers. Every time the wearer revives an ally, they gain 10% TM — so a successful revive both saves the team and accelerates the wearer’s next turn.
Heal ‘N’ Go
The wearer has a 5% chance to get an Extra Turn when healing an ally with an active skill. Guide: Slot on dedicated healers with low-CD heal skills. The 5% chance to chain an Extra Turn after a heal is small but consistent — the more heals you cast, the more chances you get to cycle.
Caught Unaware
The wearer gains 25 ACC for each enemy who has not taken a turn yet. Guide: Top pick for opening debuffers in Arena. The +25 ACC per enemy who has not acted stacks up to 100+ in the first round, making the wearer’s debuffs land reliably before enemies can respond.
Parting Gift
Whenever an ally is killed by an enemy, the wearer has a 10% chance to decrease the cooldown of one of their skills. Guide: Best on supports in attrition fights. Each ally death gives the wearer a 10% chance to reset a skill CD, so the longer the fight drags on, the more skills come back online.
Gathering Momentum
Increases the wearer’s Turn Meter by 3% each time they place a debuff on an enemy. Cannot increase the wearer’s Turn Meter by more than 20% in a single turn. Guide: Excellent on multi-debuff champions. Each debuff the wearer places adds +3% TM, capped at 20% per turn — so spreading debuffs naturally accelerates the wearer’s turn cycles.
Carved Open
The wearer’s default skill will ignore 10% of the target’s RES. Guide: Slot on champions with debuff-applying default skills. The 10% RES ignore applies to every A1, so it makes the wearer’s basic attacks reliable debuff tools in long fights.
Expeditious Exploration
Increases the wearer’s SPD by 5 for each enemy under an active [Stun], [Freeze], [Sleep], [Provoke], [Fear], [True Fear], [Petrification], or [Sheep] debuff placed by the wearer. Guide: Best on champions that apply many CC debuffs. Each CC’d enemy adds +5 SPD to the wearer, so the more CC you spread, the faster the wearer acts — a self-feeding speed engine.
Precision Removal
The wearer’s ACC increases by 30 when removing buffs. Guide: A must-have for buff-stealers and buff-cleaners. The +30 ACC applies only when removing buffs, so it makes buff-steal attempts much more reliable in Arena matchups.
Starting Strength
The wearer’s RES increases by 30 until they take a turn. Resets each Round. Guide: Slot on slow-cycling supports and revivers. The +30 RES protects the wearer before they act for the first time each round, making them much harder to CC during setup turns.
Energy Expansion
Every time the wearer receives healing from a skill, increases the wearer’s MAX HP by 1% (stacks up to 10%). Guide: Best on self-healing tanks and supports. Each heal received adds +1% MAX HP, capping at +10% — a slow but permanent HP scaling that rewards sustained healing.
Revival Blessing
Allies revived by the wearer are additionally healed by 10% of the wearer’s HP. Guide: Top pick for revivers. The 10% of the wearer’s HP heals the revived ally on top of the base revive HP, so a high-HP reviver significantly extends the team’s survivability.
Enhanced Shot
The wearer’s ACC increases by 3 per each buff on them. Guide: Best on buff-stacking champions, especially those with Increase ACC buffs. The more buffs the wearer has, the more ACC they gain — a self-feeding accuracy engine for hybrid debuff builds.
Blessed Heal
When the wearer heals an ally with a skill, the heal is 10% more effective. Guide: Slot on dedicated healers. The +10% applies to every active-skill heal, so it scales naturally with multi-target heals and makes the wearer’s healing noticeably stronger.
Unburdened
The wearer’s SPD increases by 2 for each dead ally. Guide: A late-game scaling speed gem. Each dead ally adds +2 SPD to the wearer, so in attrition fights the survivor becomes the fastest — punishing enemies that try to out-cycle the team.
Greater Restoration
When the wearer restores destroyed MAX HP, the restore is 25% more effective. Guide: Best on tanks facing MAX HP-drain enemies. The +25% boost to MAX HP restoration helps the wearer maintain their HP pool against HP-destroy mechanics, ideal for Boss fights with MAX HP-drain phases.
Pentagonal Gemstones (Standard Group)
Pentagonal Gemstones are turn-meter and speed-control specialists — they accelerate the wearer’s turn cycles, resist enemy TM manipulation, manage cooldowns, and stack RES through buffs and debuffs. Top pick for control champions, cooldown-heavy kits, and any team that needs to act faster than the enemy.
Icon
Gemstone Description
Slow The Enemy
Increases the wearer’s ACC by 40 when using Turn Meter reduction effects. Guide: Best on champions that apply Turn Meter reduction. The +40 ACC makes TM-down effects land reliably on high-RES targets, ideal for control builds in Arena.
Patient Refuge
When the wearer is forced to miss their turn, the damage received by them is decreased by 30%. Guide: Top pick for champions that get stunned, frozen, or slept often. The -30% damage reduction applies while CC’d, so the wearer’s forced idle turns become survival windows.
Impede Them
Increases the wearer’s ACC by 40 when using Increase Cooldown Effects. Guide: Pair with cooldown-increasing champions. The +40 ACC makes Increase Cooldown effects land reliably, denying enemy ultimates in Arena and Boss fights.
Skillmaster
Increases the wearer’s RES by 40 when resisting Increase Cooldown Effects. Guide: Top pick for champions with high-impact skills. The +40 RES protects the wearer when enemies try to add cooldowns, ensuring key skills stay online.
Nimblemiss
The wearer receives 5% Turn Meter each time an enemy resists a debuff placed by the wearer. Cannot gain more than 20% Turn Meter in a single turn. Guide: A defensive-turn-meter gem. Each resisted debuff gives the wearer +5% TM, capping at 20% per turn — so the more the enemy tries to CC you, the faster you cycle.
Skill Adept
The wearer has a 10% chance to prevent their skills being placed on cooldown during an Extra Turn. Guide: Best on champions with Extra Turn mechanics. The 10% chance to keep skills off cooldown during an Extra Turn preserves the rotation, ideal for sustained DPS cycles.
Power Reset
Whenever the wearer’s HP drops below 50%, has a 10% chance to reduce the cooldown of a random active skill by 1 turn. Guide: A clutch-survival gem. When the wearer drops below 50% HP, each turn has a 10% chance to reset a random skill CD — so dipping low can actually accelerate the comeback.
Speedy Willpower
The wearer receives 5% Turn Meter each time they resist a debuff. Cannot gain more than 20% Turn Meter in a single turn. Guide: Slot on resist-stacking champions that get debuffed often. The +5% TM per resisted debuff compounds across multi-debuff turns, so the more the enemy tries to CC you, the faster you cycle back.
Growing Resolve
The wearer’s RES increases by 5 whenever a debuff is placed on them (stacks up to 40). Guide: Best on tanks and debuffers that intentionally soak debuffs. Each debuff adds +5 RES, capping at +40 — so the more the enemy tries to CC you, the harder you are to CC next time.
Maximum Velocity
The wearer gains 10% Turn Meter after taking an Extra Turn. Guide: Top pick for Extra Turn specialists. Every Extra Turn is followed by +10% TM, so the wearer can chain Extra Turns into a near-permanent cycle in the right team.
Survival Speed
Fills the wearer’s Turn Meter by 10% when their HP drops below 50%. Guide: A clutch-survival speed gem. The moment the wearer dips below 50% HP, they gain 10% TM — ideal for low-HP clutch plays and turn-order manipulation.
Assured Security
The wearer’s RES increases by 30 against buff removal and buff steal effects. Guide: Top pick for buff-dependent supports. The +30 RES protects the wearer’s buffs from being stripped or stolen, so the team’s buff-stacking strategy stays intact.
In For The Kill
The wearer gains 3% Turn Meter whenever an enemy loses 25% or more HP. Cannot gain more than 20% Turn Meter in a single turn. Guide: Best on damage dealers that chunk enemies. Each time the wearer deals big damage (at least 25% HP loss), they gain +3% TM, capped at 20% per turn — so burst damage accelerates the wearer’s turn.
Fleetfoot
The wearer’s Turn Meter increases 5% faster when they are forced to miss their turn. Guide: Pair with Patient Refuge for a defensive-speed combo. When the wearer is CC’d and forced to miss, their TM fills 5% faster — turning idle turns into a speed boost.
Unbroken Strength
The wearer’s RES increases by 3 per each buff on them. Guide: Best on buff-stacking champions. Each buff on the wearer adds +3 RES, so the more buffs the wearer maintains, the harder they are to debuff.
Extra Velocity
The wearer’s Turn Meter increases by 3% whenever the wearer fails to place a debuff. Cannot increase the wearer’s Turn Meter by more than 20% in a single turn. Guide: Top pick for debuffers that occasionally miss. Each failed debuff gives the wearer +3% TM, capped at 20% per turn — so even resisted debuffs feed the wearer’s cycle.
Square Gemstones (Standard Group)
Square Gemstones are defensive survivability specialists — they reduce incoming damage, enhance Shields, reflect damage back at attackers, and counter Provoke-heavy enemy lineups. Built for tanks, supports, and any champion that needs to survive enemy focus fire.
Icon
Gemstone Description
Torpidity
Decreases an enemy’s SPD by 7% if they are under a [Stun], [Freeze], [Sleep], [Fear], [True Fear], [Petrification], or [Sheep] debuff placed by the wearer. Guide: Slot on champions that apply CC debuffs. Each CC’d enemy loses 7% SPD, which compounds in long fights — the more CC you spread, the slower the enemy team acts.
Goad God
The wearer ignores 15% of the target’s RES when placing [Provoke] debuffs. Guide: A must-have for Provoke-focused champions. The 15% RES ignore helps land Provoke on high-RES Arena targets, making the entire enemy team attack the wearer.
Blunt Blades
Enemies under a [Provoke] debuff have a 15% chance to land a weak hit on the wearer. Guide: Pair with Goad God on the same Provoke tank. Once the enemy team is forced to attack the wearer, each hit has a 15% chance to be weak — a serious mitigation layer in Arena.
Buff Depletion
When attacked, the wearer has a 15% chance to decrease the duration of a random buff on the attacker by 1 turn. Guide: Slot on tanks and supports. The 15% proc on every hit strips a random buff from the attacker, slowly dismantling their offensive setup across the fight.
Steadfast Preparation
If the wearer loses 20% or more of their MAX HP from a single attack, the next hit received will deal 20% less damage. Guide: Best on tanks facing high-burst enemies. The -20% reduction on the next incoming hit helps the wearer survive the follow-up after a big hit, rewarding attrition-style play.
Weakening Resolve
When attacked with a multi-hit skill, decreases the damage the wearer receives from each subsequent hit after the first one by 10%. Guide: Best on tanks facing multi-hit nukers. Each subsequent hit in a multi-hit skill deals -10% less, so a 5-hit skill’s final hit is -40% weaker — strong scaling against high-hit-count enemies.
Damage Mitigation
If the incoming damage will exceed 30% of the wearer’s MAX HP, decreases the damage received by 10%. Guide: Best on squishy champions facing Boss hits. The -10% reduction only triggers on hits that would deal more than 30% of the wearer’s MAX HP, so it specifically counters one-shot attempts.
Opening Gambit
Increases the wearer’s chance of placing debuffs with their default skill by 5%. Guide: Slot on champions with debuff-applying A1s. The +5% debuff chance stacks with existing ACC, making default skills much more reliable at landing their debuffs in early rounds.
Single Combat Master
The wearer receives 5% less damage from single-target attacks. Guide: Best on champions facing single-target nukers in Arena. The -5% reduction is universal across every single-target hit, so it is a solid default defensive pick against Boss-like damage dealers.
Weak Retort
The wearer receives 15% less damage from counterattacks. Guide: Slot on tanks facing counterattack-heavy teams (Skullcrusher, Martyr, etc.). The -15% reduction on every counterattack significantly reduces the wearer’s damage intake from retaliation-focused enemies.
Strengthening Will
The damage received by the wearer decreases by 1% for every 10% HP lost. Guide: Best on attrition tanks that intentionally dip low. Each 10% HP lost adds -1% to incoming damage, so a 50% HP tank gets -5% and a near-death tank gets -10% — a survival scaling mechanic.
Strength Sap
When the wearer is attacked, destroys the attacker’s MAX HP by 3% (stacks up to 30%). Guide: Top pick for counter-attackers and tanks. Every hit on the wearer destroys 3% of the attacker’s MAX HP, stacking to 30% — a brutal HP-drain mechanic in extended fights.
Barbed Defense
Any [Reflect Damage] effects and buffs on the wearer deal 10% more damage to enemies. Guide: Slot on champions with Reflect Damage buffs. The +10% boost to reflected damage makes the wearer’s reflect procs much more threatening, punishing enemies for attacking.
Embellished Shield
[Shield] buffs placed on the wearer are 10% stronger. Guide: Best on champions that frequently place or receive [Shield] buffs. The +10% boost is universal across all Shield sources, making the wearer tankier in defensive compositions.
Steadfastness
Destroy HP effects are 20% less effective against the wearer. Guide: Top pick for tanks facing HP-drain teams. The -20% reduction applies to every Destroy HP effect, helping the wearer maintain their MAX HP against attrition-based enemies.
Sanctified Skin
The wearer receives 10% more healing. Guide: Slot on tanks, supports, and self-healers. The +10% healing received applies to every heal source, so the wearer stays topped up in long fights — excellent sustain for sustain-focused builds.
Triangular Gemstones (Standard Group)
Triangular Gemstones are pure damage amplifiers — every one of them rewards aggressive play through C.DMG, C.RATE, DEF ignore, multi-hit scaling, and kill-based triggers. Best-in-slot for nukers, execute-style finishers, and any champion whose role is to deal damage as fast as possible.
Icon
Gemstone Description
Extra Punishment
The wearer deals 20% more damage against enemies under [Stun], [Freeze], [Sleep], [Provoke], [Fear], [True Fear], [Petrification], or [Sheep] debuffs. Guide: Best on AoE nukers in teams with a strong CC setter. The +20% applies to every hit on a stunned, frozen, slept, provoked, feared, or sheeped target, making it one of the strongest damage amplifiers in the game.
Double Down
When attacking targets under [Stun], [Freeze], [Sleep], [Provoke], [Fear], [True Fear], [Petrification], or [Sheep] debuffs with their default skill, the wearer has a 10% chance to repeat the attack once. Guide: Slot on champions with strong default skills who attack CC’d targets often. The 10% proc chance is small but compounds across multi-hit A1s in wave content.
Constant Onslaught
The wearer has an 8% chance to gain an Extra Turn after killing an enemy. Guide: Excellent for wave-clearers and AoE champions. Killing an enemy has an 8% chance to give an Extra Turn, so the more kills you chain, the more turns you keep — dominant in Faction Wars and Dungeons.
Sharpened Riposte
The wearer deals 50% more damage when counterattacking. Guide: Best on counterattack-focused champions (Skullcrusher, Martyr, etc.). The +50% damage multiplier on every counterattack is massive — it turns a defensive proc into a serious damage threat.
Piercing Strike
After killing an enemy, the wearer’s next attack will ignore 12% of the target’s DEF. Guide: Slot on nukers with multi-target skills. After a kill, the next attack ignores 12% DEF, so it snowballs in wave content and Boss fights with adds.
Critical Strategy
Increases the wearer’s C.DMG by 10% for each enemy whose HP is at 50% or lower. Guide: Best on AoE nukers in Boss fights and Faction Wars. Each low-HP enemy on the field adds +10% C.DMG, so the gem scales naturally as the fight progresses and enemies weaken.
Rolling Force
When using multi-hit skills, each consecutive hit after the first one that the wearer makes will ignore 5% more of the target’s DEF. Guide: Best on multi-hit nukers hitting high-DEF targets. Each hit after the first ignores 5% more DEF, so a 5-hit skill lands its last hit ignoring 20% additional DEF — a strong armor-shred scaling on long rotations.
Attacking Prowess
The wearer has an 8% chance to reset a skill’s cooldown if it kills an enemy. Occurs once per skill. Guide: Top pick for nukers with high-impact cooldowns. The 8% reset chance on a kill means your ultimate can come back online faster, especially in long fights with many enemies.
Pouncing Strike
When attacking an enemy, increases the wearer’s C.RATE by 5% for each active debuff on the target placed by the wearer. Guide: Best on debuffers with multi-debuff kits. The more debuffs the wearer places on a target, the higher the C.RATE — so it rewards sustained debuff pressure into devastating crits.
Target Smash
The wearer’s damage increases by 1% of their total ACC. Guide: Slot on high-ACC champions (typically debuffers with 300+ ACC). 1% of total ACC is added to damage, so a 400-ACC champion gets +4% damage — a meaningful boost for hybrid debuff and damage builds.
Unrelenting Power
When using multi-hit skills, each consecutive hit after the first one that the wearer makes will deal 3% more damage. Guide: Best on multi-hit nukers. Each consecutive hit in the skill deals +3% more damage, so a 5-hit skill gains +12% damage on the last hit alone — strong scaling on long rotations.
Quickstrike
If no enemy has taken a turn yet, the wearer’s first attack will deal 10% more damage. Guide: Top pick for fastest champions in Arena and Tournament setups. The +10% only applies to the first attack of the round, so slot on champions built to act first and eliminate priority targets.
Unbowed Might
The wearer’s C.DMG increases by 3% for each debuff they are under (stacks up to 30%). Guide: Counterintuitive but powerful on champions that intentionally soak debuffs. The more debuffs on the wearer, the more C.DMG they gain — capping at +30% on heavily-debuffed targets.
Pierce Defences
The wearer will ignore 3% of the target’s DEF if the target is under 2 or more debuffs. Guide: Pairs with multi-debuff kits. The 3% DEF ignore only triggers when the target is debuffed twice or more, so slot on champions built to spread debuffs before their big hit.
Shieldbreaker
The wearer deals 5% more damage to targets under a [Shield] buff per each buff on the target. Guide: Excellent against buff-stacking teams (shield, Increase ATK, counterattack). Each buff on the target adds +5% damage, so a fully-buffed enemy takes massively more damage.
Lifedrain
The wearer’s critical hits destroy 1% of the target’s MAX HP per each buff on the wearer (stacks up to 20%). Guide: Best on buff-heavy champions with high C.RATE. The more buffs the wearer stacks, the more MAX HP the crit destroys — turning buff-spam builds into Boss-killers.
Live Arena Gemstones
Circular Gemstones (Live Arena Group)
Circular Gemstones are debuff-exploiter damage amplifiers — most boost the wearer’s damage against enemies already affected by [Poison], [HP Burn], or specific Affinities, with secondary utility for counter-attackers and Extra Turn specialists. Best for champions that capitalize on debuffed targets and aggressive Arena play.
Icon
Gemstone Description
Momentum Breaker
The wearer has a 20% chance to counterattack using their default skill when an enemy receives an Extra Turn or Instant Turn. Guide: Best for champions who face frequent extra-turn chains from enemies. Pair with champions that have strong default skills, especially in long Arena matches where enemy momentum swings are common.
Fortuitous Velocity
Increases the chance for the wearer to gain an Extra Turn from skills by an additional 5%. Guide: Slot on any champion with Extra Turn mechanics to make their chains more reliable. Even a small bump compounds across multi-turn sequences.
Toxin’s Touch
The wearer deals 10% more damage against enemies under [Poison] debuffs. Guide: Pairs perfectly with champions that apply [Poison] debuffs, or in teams that have a dedicated poisoner. Since most Arena targets eventually get poisoned, the bonus damage is almost always live.
Pyromaniac
The wearer deals 10% more damage against enemies under [HP Burn] debuffs. Guide: Best on champions fighting teams with [HP Burn] debuffs, or on a champion that applies [HP Burn] themselves. The damage boost applies to every hit on a burning target.
Magic Destroyer
The wearer deals 5% more damage against Magic Affinity enemies. Guide: Use on nukers in factions where you commonly face Magic Affinity enemies (Demonspawn, Dark Elves, Undead Hordes). The +5% adds up across multi-hit skills.
Old Sorcery
The wearer ignores 10% of a target’s RES when transferring debuffs. Guide: Niche but strong for champions with debuff-transfer mechanics. Helps land debuffs on high-RES targets that would otherwise resist.
You Asked For It
The wearer deals 10% more damage while under a [Provoke] debuff. Guide: Slot on a tank that provokes itself and also deals damage. The provoke becomes a damage amplifier rather than a liability.
Woe to The Besieged
The wearer ignores 5% of an enemy’s RES in Siege Battles. Guide: Exclusive to Siege Battles. Use on your debuffers in Siege offense teams to push past high-RES enemy builds. Don’t slot this on general Arena nukers — it does nothing outside Siege.
Triangular Gemstones (Live Arena Group)
Triangular Gemstones are the purest damage amplifiers in the system — all eight increase the wearer’s damage output or armor-piercing capability. Best-in-slot for Arena nukers, execute-style finishers, and any champion whose role is to deal damage as fast as possible.
Icon
Gemstone Description
No Mercy
The wearer deals 5% more damage for every 25% of a target’s lost HP. Guide: Best on execute-style champions or any damage dealer in long fights. The bonus scales continuously, so the longer the battle goes, the more this gem contributes.
Know Thy Enemy
The wearer ignores 5% DEF when attacking an enemy with a different Affinity to the wearer’s. Guide: Most Arena matchups are cross-affinity, so this gem is almost always live. Slot on your main damage dealer — the DEF ignore stacks with your artifact set bonuses.
Take Em Down
Increases the wearer’s Ignore DEF by 5% against enemies whose MAX HP is greater than the wearer’s in Siege & Arena. Guide: Excellent for nukers going up against high-HP tanks. The “MAX HP greater than wearer” condition works against any bigger target. Siege-only mode makes it a top pick for Siege offense.
Fearmonger
The wearer deals 10% more damage against enemies under [Fear] or [True Fear] debuffs. Guide: Pair with a fear-setter in your team. The +10% bonus only triggers when the enemy is feared, so you need the setup.
Bloody Momentum
The wearer’s C. DMG increases by 5% each time they kill an enemy (stacks up to 25%). Guide: Top-tier for AoE champions in wave-based content (Dungeon, Faction Wars, Hydra). The C.DMG stacks reset on death, so champions with revive support benefit most.
Void Slayer
The wearer deals 5% more damage against Void Affinity enemies. Guide: Use on nukers when facing Void-heavy enemy lineups (Banner Lords, Knights of Freljord, Ogryn Tribes, Lizardmen). The +5% applies to every hit on a Void target.
The Strong Survive
The wearer deals 5% more damage to enemies whose ATK is lower than or equal to the wearer’s ATK. Guide: Best on high-ATK champions (typically ATK-based nukers). The condition checks ATK comparison, so slot on champions whose ATK outpaces their enemy’s.
Fighting Fury
The wearer deals 5% more damage on every third skill used. Guide: Top pick for champions with low-CD skill rotations (3 or 4 turn CDs). Champions with high-CD ultimates won’t trigger the bonus often, so this rewards fast-cyclers.
Square Gemstones (Live Arena Group)
Square Gemstones are defensive and survivability-focused — most reduce incoming damage, boost RES, or counter crowd control. Essential for tanks, supports, and any champion that needs to survive enemy focus fire.
Icon
Gemstone Description
Blinding Barrage
The wearer ignores 15% of a target’s RES when placing [Stun] debuffs. Guide: A must-have for stunners facing high-RES Arena teams. Pair with champions like Skullcrusher or Psylar — landing the stun becomes much more reliable.
Nigh Impermeable
The wearer receives 10% less damage from enemies with a different Affinity to the wearer’s. Guide: A universal defensive gem. Since most Arena fights are cross-affinity, this -10% is almost always active. Best on tanks and supports that draw enemy focus.
Unflappable
Decreases the chance that the wearer’s skill won’t activate due to [Fear] or [True Fear] debuffs by 10%. Guide: Slot on any champion whose key skills get skipped by enemy fear. Particularly valuable for slow-cycling ultimates where one skipped turn can lose a match.
Hunker Down
The wearer receives 25% less damage from [Bomb] debuffs. Guide: Counter-pick for teams that face heavy [Bomb] debuff users. The 25% reduction is huge — almost half a damage source removed.
Standing Proud
The wearer’s RES increases by 50 while under a [Taunt] buff. Guide: Best on champions that place [Taunt] on themselves. Combines well with other RES-boosting gemstones for a defensive stack.
Self Control
The wearer’s RES increases by 10 for each turn of cooldown remaining on all their active skills (stacks up to 100). Guide: Strong on champions with high-CD skills that spend turns waiting on cooldowns. The longer the CDs, the more RES you stack — eventually capping at +100.
Will of Iron
Increases the wearer’s RES by 5 for every 5% of HP lost. Guide: Best on survivability-focused champions that can dip low (tanks with self-heal, revive, or lifesteal). The RES scales with damage taken, rewarding attrition-style play.
Runes of Shielding
The wearer receives 10% less damage from critical hits. Guide: Slot on tanks that face high-crit enemies. The -10% applies to every critical hit, making it excellent against crit-focused Arena teams.
Diamond Gemstones (Live Arena Group)
Diamond Gemstones are support and utility-focused — they boost turn meter, enhance healing, enable buff stealing, and counter enemy debuffs. Best for supports, debuffers, and hybrid champions whose role is to enable the team rather than deal raw damage.
Icon
Gemstone Description
Monstrosity
The wearer ignores 15% of a target’s RES when placing [Fear] or [True Fear] debuffs. Guide: Counterpart to Blinding Barrage but for fear. Slot on fear-setters to push through high-RES enemy builds.
Living Dynamo
Turn Meter fill effects from skills are 15% more effective on the wearer. Guide: Best on champions that receive TM from allies. The +15% makes every TM boost more impactful, accelerating turn cycles.
Last Stand
Healing and [Shield] buffs received while the wearer is below 50% HP are 25% more effective. Guide: A clutch-survival gem for tanks and sustain champions. The 25% boost only kicks in below 50% HP, so you need to either dip intentionally or rely on incoming heals/shields.
Weakness Revealed
The wearer receives 5% less damage from enemies under debuffs placed by the wearer. Guide: Top pick for debuffers with multi-debuff kits. The more debuffs you place, the safer you are from counter-attacks.
Perfect Heist
The wearer’s ACC increases by 30 when attempting to steal buffs. Guide: Slot on buff-stealers. The +30 ACC only triggers during steal attempts, but those moments are critical — landing the steal often decides the fight.
Force Breaker
The wearer deals 5% more damage against Force Affinity enemies. Guide: Use on nukers against Force-heavy teams (Sacred Order, Undead Hordes, Barbarians, High Elves). Like the other affinity slayers, the +5% adds up across multi-hit skills.
Tough Hide
The wearer receives 5% less damage from enemies whose DEF is lower than or equal to the wearer’s DEF. Guide: Best on high-DEF champions facing glass-cannon nukers. The condition is enemy DEF ≤ your DEF, so slot on tanks and DEF-stacking champions.
Rapid Regrowth
Increases the amount of healing the wearer provides by 5% each time they heal a target (stacks up to 15%). Guide: Top pick for healers in long fights. The heal bonus stacks but caps at 15%, so the value is highest on multi-heal kits.
Pentagonal Gemstones (Live Arena Group)
Pentagonal Gemstones are debuff-application specialists — they provide strong support for placing debuffs (ignore RES) and offensive bonuses against debuffed targets. Top pick for debuffers, control champions, and any build that revolves around applying [Poison], [Freeze], [Stun], or [Provoke].
Icon
Gemstone Description
Ruinous Venom
The wearer ignores 15% of a target’s RES when placing [Poison] debuffs. Guide: Best-in-slot for poisoners. Pair with champions that apply [Poison] to land the debuff even on high-RES Arena targets.
Abyssal Ice
The wearer ignores 15% of a target’s RES when placing [Freeze] debuffs. Guide: Counterpart to Blinding Barrage and Monstrosity, but for freeze. Slot on freezer champions to land the debuff reliably on high-RES enemies.
Toy with Foes
The wearer deals 10% more damage against enemies under [Provoke] debuffs. Guide: Excellent on AoE nukers that face provoke-heavy teams. Once the enemy taunter is provoked, every hit on them gets +10% damage.
Taking Advantage
The wearer deals 10% more damage against enemies under [Stun] debuffs. Guide: Pairs with a stunner in your team or in the enemy’s (you benefit either way). The +10% triggers on every hit against a stunned target.
Spirit Breaker
The wearer deals 5% more damage against Spirit Affinity enemies. Guide: Use on nukers facing Spirit-heavy lineups (Dark Elves, Sacred Order, Undead Hordes, Demonspawn). Same as the other affinity slayers — +5% adds up.
Essence Taker
The wearer is healed by 20% of the damage inflicted when killing an enemy with a skill. Guide: Excellent on AoE nukers and wave-clearers. The heal triggers on every kill, so the more enemies you take down, the more you sustain — particularly powerful in extended fights.
Skullcracker
The wearer deals 5% more damage to enemies whose DEF is lower than or equal to this Champion’s DEF. Guide: Slot on high-DEF champions that also deal damage. The condition is stat-based, so pair with artifact sets that boost DEF (Guardian or Defiant).
Tactical Withdrawal
The wearer receives 5% less damage while under a [Stun], [Freeze], [Sleep], [Provoke], [Fear], [True Fear], [Petrification], [Duel], or [Entangle] debuff. Guide: A small but universal defensive option. The -5% applies whenever the wearer is under any of 9 CC debuffs — useful on any champion that gets crowd-controlled often.
Relics Guide
Relics are equippable items that grant Champions specific stat boosts and unique Abilities. Unlike other equipment in the game, each Relic’s bonuses and Abilities are fixed and cannot be altered. However, Relics themselves can be upgraded to increase their effectiveness.
Stat Bonuses Offered by Relics
Relics can enhance the following Champion stats:
HP: Increases health pool.
ATK: Boosts attack power.
DEF: Improves defense.
SPD: Enhances speed.
C.DMG: Increases critical hit damage.
RES: Boosts resistance to debuffs.
ACC: Improves accuracy for landing debuffs and effects.
Customization with Gemstones
To further customize Relics, players can insert Gemstones into Sockets . These Gemstones provide additional passive Abilities, allowing you to fine-tune your Champion’s capabilities. Each Relic has a set number of Sockets based on its Rarity, and Gemstones can only be inserted into Sockets of matching shapes.
Relic Groups
Relics are categorized into different Groups, which determine how they can be crafted and where their crafting Materials come from. Each Group offers unique opportunities to acquire and craft Relics, catering to different playstyles and progression paths. Below is a breakdown of the various Relic Groups:
Standard Group: Crafted in the Forge using any Materials from any location.
Chimera Group: Crafted in the Forge using Materials obtained from Chimera Battles.
Event Group: Earned from time-limited Events or crafted using Event-specific Materials.
Clan Group: Crafted in the Forge using Materials found in the Clan Shop.
Live Arena Group: Crafted in the Forge using Materials earned in the Live Arena.
Relic Rank and Rarity
All Relics have a Rank and Rarity, which dictate their potential strength and customization options. A Relic’s Rarity determines the number of sockets it has, it’s starting Rank, and the strength of its unique Ability.
Rare relic has 1 socket and starts at Rank 1
Epic relic has 2 sockets and starts at Rank 2
Legendary relic has 3 sockets and starts at Rank 3
Mythical relic has 4 sockets and starts at Rank 4
Relic Max upgrades based on Rank
The Rank of a Relic determines its maximum Level. There are six Ranks (1–6), and each Rank unlocks higher Levels as you upgrade the Relic.
Rank 1 – Max upgrade level is 3
Rank 2 – Max upgrade level is 6
Rank 3 – Max upgrade level is 9
Rank 4 – Max upgrade level is 12
Rank 5 – Max upgrade level is 15
Rank 6 – Max upgrade level is 18
Upgrade Relic Requirement
To upgrade a Relic’s Rank, you must:
Upgrade it to its current Rank’s maximum Level.
Sacrifice other Relics or Basalt of the same Rank. The required amount equals the Relic’s current Rank (e.g., upgrading a Rank 3 Relic requires 3 Relics or Basalt of Rank 3).
Relic Leveling
A Relic’s Level directly impacts its stat bonuses and the strength of its unique Ability. All Relics start at Level 0 and can be upgraded to a maximum of Level 18 at Rank 6 using Starstones. Below are the leveling mechanics of a relic:
Stat bonuses increase with each Level.
New stat bonuses are unlocked at Levels 9 and 15.
The Relic’s unique ability gains additional levels at Levels 6, 9, 12, 15, and 18, making it progressively stronger.
Gemstones Guide
Enhancing Relics with Gemstone Sockets
Sockets allow players to customize Relics by inserting Gemstones, which grant additional passive Abilities. Gemstones can only be socketed into Sockets of the same shape in the Relic. The number and shape of a Relic’s Sockets are fixed and cannot be altered. There are five Socket shapes, and each corresponds to a specific shape of Gemstone:
Circular
Diamond
Pentagonal
Square
Triangular
Gemstone Rarities
Like Relics, a Gemstone’s Rarity is predetermined and cannot be changed. However, Gemstones can be socketed into any Relic, regardless of the Relic’s Rarity. For example, you can insert a Mythical Gemstone into a Rare Relic. Gemstones come in four Rarities, each determining the strength of their passive Ability:
Rare
Epic
Legendary
Mythical
Strategic Considerations
When building your Champions with Relics, consider the following:
Rarity and Rank : Higher-Rarity Relics offer more Sockets and better base stats, but upgrading them to Rank 6 requires significant resources.
Gemstone Synergy : Choose Gemstones that complement your Champion’s role and kit. For instance, a support Champion may benefit from Gemstones that enhance healing or debuff application.
Relic Group Availability : Focus on acquiring Relics from Groups that align with your playstyle and resource availability (e.g., prioritizing Event Relics during limited-time Events).
Stat Prioritization : Tailor your Relic upgrades to maximize key stats for your Champion’s role (e.g., SPD for fast attackers, HP/DEF for tanks).
Relics and Gemstones FAQ
Here is a list of frequently asked questions regarding Relics and Gemstones in Raid Shadow Legends!
What are Relics in the game? Relics are powerful equippable items that provide stat bonuses and unique Abilities to Champions. Each Relic’s bonuses and Abilities are fixed and cannot be changed, though Relics can be upgraded to increase their effectiveness.
What stats do Relics increase? Relics can boost key Champion stats including HP, ATK, DEF, SPD, Critical Damage, Resistance, and Accuracy.
What are Relic Groups and how do they work? Relics are divided into Groups based on how they are obtained and the crafting Materials used. Groups include Standard (crafted with any Materials), Chimera (from Chimera Battles), Event (from time-limited Events), Clan (Clan Shop), Live Arena, and Faction Wars Hard Mode.
What is the difference between Relic Rank and Relic Rarity? Relic Rarity (Rare, Epic, Legendary, Mythical) determines how many Sockets a Relic has and the strength of its Ability. Relic Rank (1–6) determines the maximum Level a Relic can be upgraded to.
How many Sockets does each Relic Rarity have? Rare Relics have 1 Socket, Epic Relics have 2 Sockets, Legendary Relics have 3 Sockets, and Mythical Relics have 4 Sockets.
How do you upgrade Relics? Relics can be leveled up with Starstones to improve their stats and Abilities. To increase a Relic’s Rank, you must max its Level, then sacrifice other Relics or Basalt of the same Rank. Relics can reach Rank 6 and Level 18.
What are Sockets on Relics? Sockets allow you to customize Relics with Gemstones. Each Relic can have Circular, Triangular, Square, Diamond, or Pentagonal Sockets. A Gemstone can only be placed in a matching shape.
What are Gemstones and how do they work? Gemstones are unique items that can be socketed into Relics to grant additional passive Abilities. Each Gemstone has a fixed shape and Rarity, and can only be placed into a corresponding Socket.
What Rarities do Gemstones come in? Gemstones can be Rare, Epic, Legendary, or Mythical. Higher Rarity Gemstones provide stronger passive Abilities, and their Rarity cannot be changed.
Can Gemstones be used on any Relic? Yes. Any Gemstone can be socketed into any Relic as long as the shape matches, regardless of Rarity. For example, a Mythical Gemstone can be used in a Rare Relic if the Socket shape is correct.
Relic and Gemstones Video Guides
Official: Raid Shadow Legends | Relics 101
ASH: What RARE RELICS Should You KEEP or TRASH?
ASH: Relic Forge Pass & MORE Basalt Finally Being Added
Leave a Reply
21 thoughts on “Relics and Gemstones Guide | Raid Shadow Legends”
Groovinator
There’s one relic you’ve got wrong, but don’t feel bad; everyone else seems to have this relic graded wrong, too.
Fleshrender is actually S-Tier for Gnut, and I can’t believe no content creator has figured that out. Think about what his A3 does. It overheals him by an absurd amount (if you have him built right), THREE TIMES, so even though the relic description downplays just how much of a damage bonus it gives, this bonus really scales well with Gnut. I tested it on him in Chimera when that was new material, one run without it and one run with it, and his damage went up significantly; if you’re doing the key manually, make sure you use his A1 immediately after his A3 (unless he counterattacks before his next turn, in which case the damage increase will apply to the counterattack), because his A2 is only a single hitter vs the triple hit A1. (Yes, the damage bonus applies to all 3 hits.)
I just ran another quick damage test on him a few minutes ago on Chimera, just on the first form, and even being weak affinity the damage difference is startling: my Gnut’s normal A1 does about 14k when he crits, 2600 when he weak hits. Right after his A3, Fleshrender ups that average to about 47k/ 10k. And that’s PER HIT.
(His stats: 52k HP, 7k DEF, 99% CR, 236% CDMG; geared in double Perception and Crit Damage sets, so no ignore defense.)
I have not found another champion whose kit is suited for Fleshrender like Gnut’s is, so for everyone but Gnut I would agree with the F tier ranking. But for Gnut, seriously it’s S tier. I encourage everyone who has Gnut to try it out. Obviously the impact will be greatest for long fights (Chimera, Clan Boss, Hydra) but I have never met anyone with a Gnut who’s not using him for that.
@katana: Exuzar’s Totem isn’t for champions who apply crowd control, it’s meant for those who cleanse or resist it. The Turn Meter boost shines on champions like Mithrala or Uugo, letting them react faster after stripping debuffs. It’s effective against CC appliers such as Fabian, not something Fabian himself would benefit from. I have reupdated Exuzar’s Totem guide description to prevent this confusion.
katana
The description for Exuzar Totem says it’s recommended for Entertainer Fabian, but doesn’t it lack any particular synergy? Wouldn’t characters with cleansing abilities or traits that prevent ailment benefit from it more?
@Rattenmaster: You can earn Gemstones by defeating the Chimera Clan Boss each week. The tougher the difficulty you manage to clear, the higher the rarity of the Gemstone you’ll receive. Occasionally, special events also offer Gemstones as rewards, though these opportunities have become quite rare nowadays.
Rattenmaster
Sorry für die Frage aber wo bekommt man die Edelsteine für die Relikte, habe im internet gesucht und keine antwort gefunden. Danke für hilfreiche antworten
@Eri: Removal cost is the same both Gemstone and Relic of the same rarity. Cost 640 Starstone to remove Mythical Gemstone or Relic Cost 320 Starstone to remove Legendary Gemstone or Relic Cost 160 Starstone to remove Epic Gemstone or Relic Cost 80 Starstone to remove Rare Gemstone or Relic
Eri
Removal cost for each rank of gemstone? Removal cost for each rank of relic? Upgrade cost for relics?
Ande
After 6-months I still cannot find answers to some very basic questions. For example, how and where do I find/get relics?
katana
The Wand of Submission is most effectively utilized by UDK and taunt champions. When equipped on UDK, it dramatically increases its activation frequency by drawing in enemy attacks and reflecting them.
Alex Boocock
Would be useful to have a guide as to where to find the relics and gems
Alex
would be useful to know where to find wach of the relics and gems
Thrasson
excellent coverage on all but one aspect of the relics that i am looking for. Which relics can be use with which relic to upgrade it rank. I have so many relics that i cant dispose of because they do not want to be used for rank up. even the same relic cannot be used with itself for a rank boost. I know you’ve mentioned it in a broad sense of my question, yes they can all be used to rank up other relics. But i am inquiring for specifics, even a chart. If i missed this topic and you did discuss it with specifics on each individual relic can be used to rank up another individual relic, i apologize. I’m scanning to fast i suppose.
@Steve Bratcher: I’ll be adding those new relics (Chaos Awakes and Discovery Relics) that are introduced into the game. Thanks!
Steve Bratcher
@Ted Clark, click on the Relics tab on any Champion, bottom left of the Relics page, “Equip”.
Steve Bratcher
@Ayumilove, missing the “Chaos Awakes” group, and the “Sinner’s Cloak” relic.
TED CLARK
I hate to sound stupid and ignorant here, but how the hell do you add them? I have many but no idea how to add them!!!! sigNed “DUMB DUMB”
Katana
It is written that it is best to give the Journal of necrotosto Tagore, but wouldn’t Gorgorab be more suitable since he can make use of both turn meter increase and healing boost?
Seth Radcliff
Hey there! I have a question. Can 2 of the same type of gemstones be inserted into a relic and the benefits be doubled? The relic allowed me to insert 2 identical gemstones but I’m wondering if it will actually produce double benefits or just be redundant and wasted. Thanks!


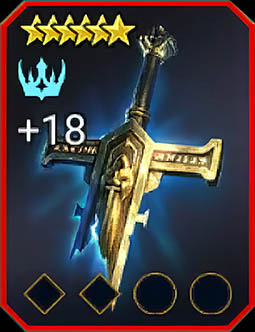
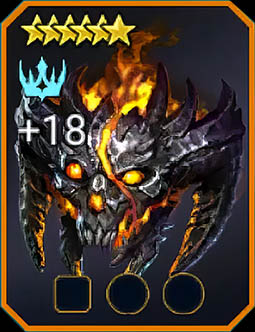


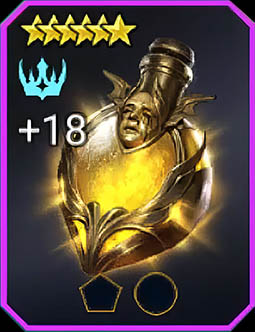
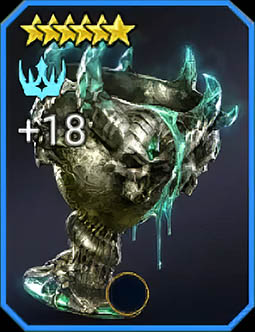
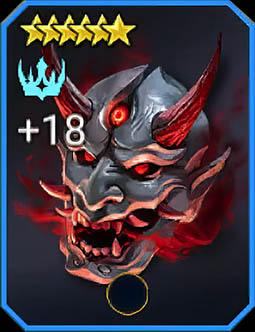
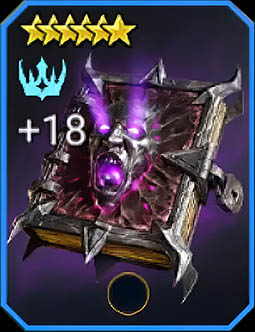

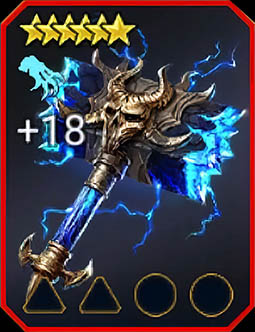
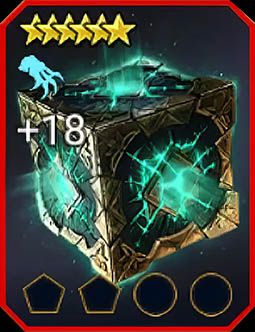
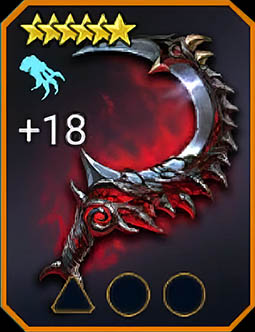
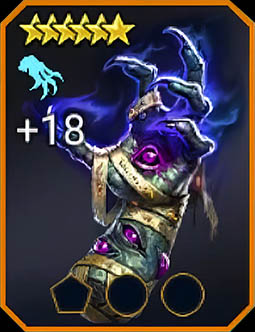
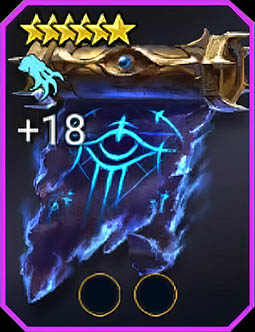
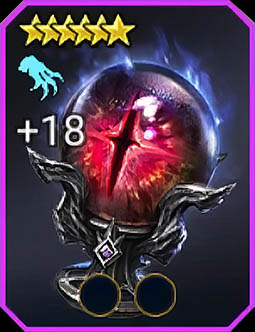
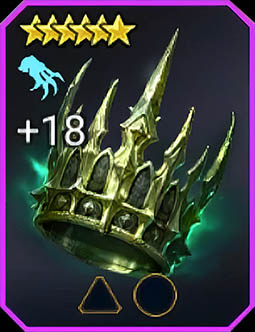
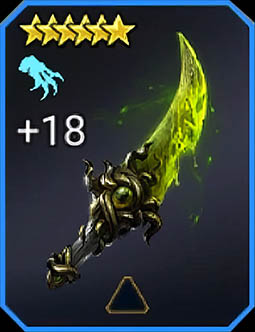

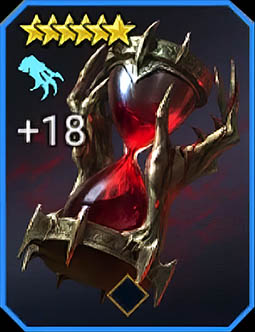
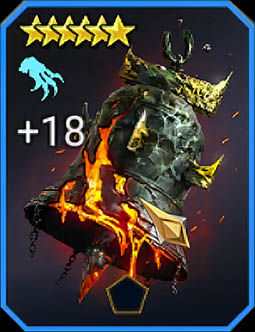


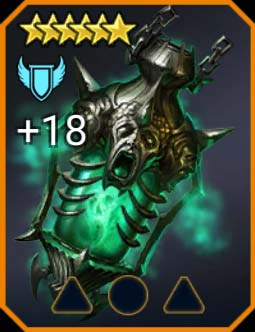

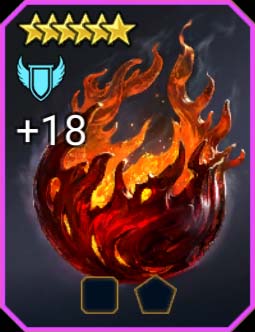
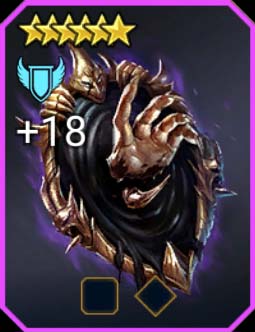


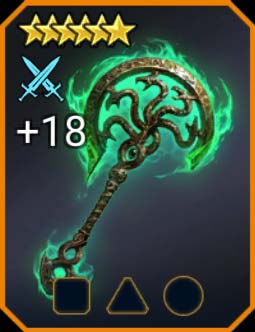


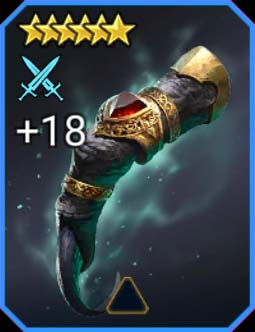
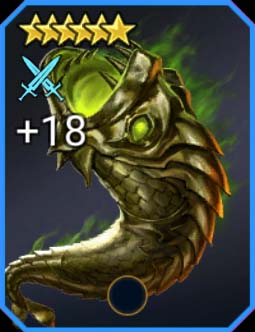
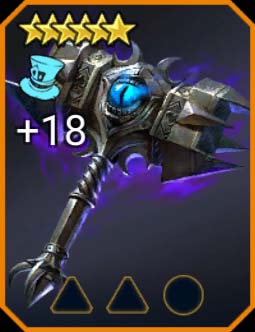


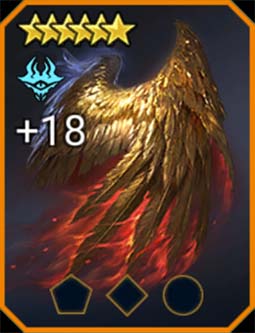


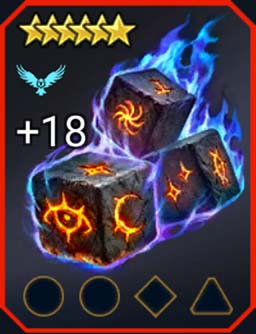


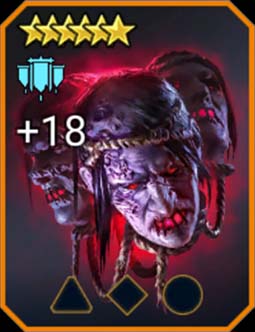
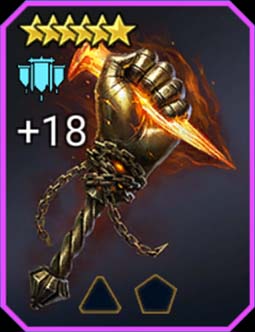


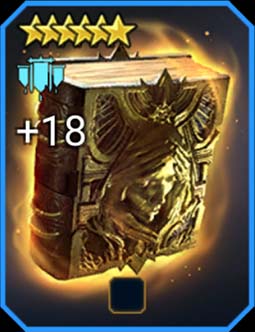
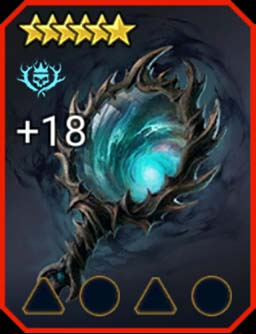
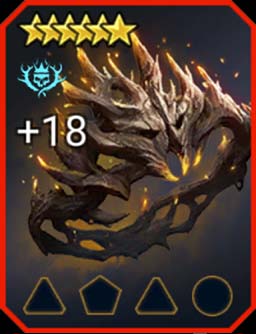
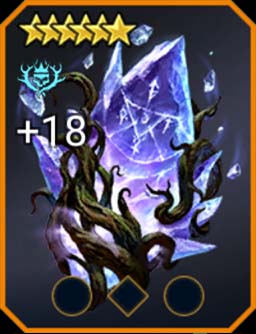
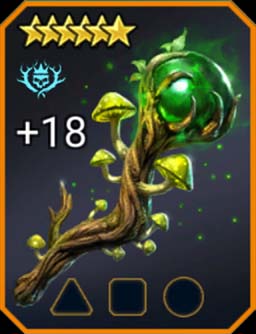


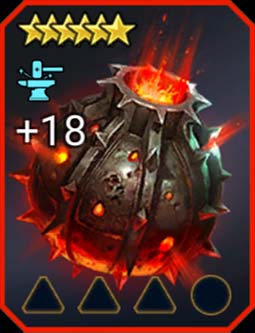
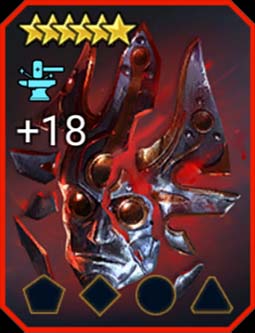
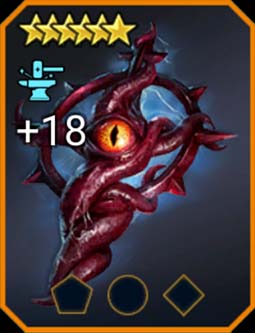
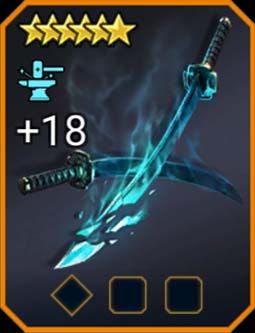
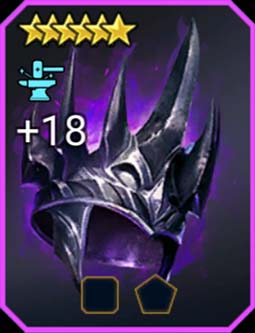
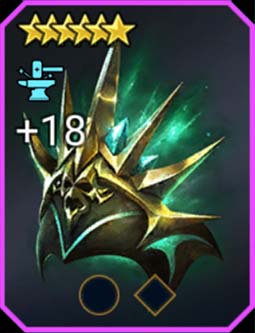
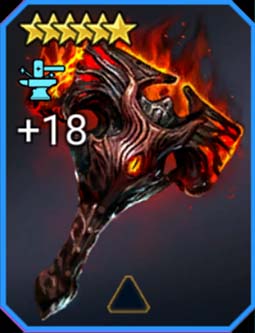
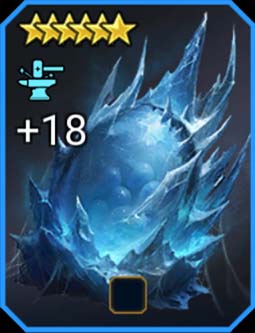


There’s one relic you’ve got wrong, but don’t feel bad; everyone else seems to have this relic graded wrong, too.
Fleshrender is actually S-Tier for Gnut, and I can’t believe no content creator has figured that out. Think about what his A3 does. It overheals him by an absurd amount (if you have him built right), THREE TIMES, so even though the relic description downplays just how much of a damage bonus it gives, this bonus really scales well with Gnut. I tested it on him in Chimera when that was new material, one run without it and one run with it, and his damage went up significantly; if you’re doing the key manually, make sure you use his A1 immediately after his A3 (unless he counterattacks before his next turn, in which case the damage increase will apply to the counterattack), because his A2 is only a single hitter vs the triple hit A1. (Yes, the damage bonus applies to all 3 hits.)
I just ran another quick damage test on him a few minutes ago on Chimera, just on the first form, and even being weak affinity the damage difference is startling: my Gnut’s normal A1 does about 14k when he crits, 2600 when he weak hits. Right after his A3, Fleshrender ups that average to about 47k/ 10k. And that’s PER HIT.
(His stats: 52k HP, 7k DEF, 99% CR, 236% CDMG; geared in double Perception and Crit Damage sets, so no ignore defense.)
I have not found another champion whose kit is suited for Fleshrender like Gnut’s is, so for everyone but Gnut I would agree with the F tier ranking. But for Gnut, seriously it’s S tier. I encourage everyone who has Gnut to try it out. Obviously the impact will be greatest for long fights (Chimera, Clan Boss, Hydra) but I have never met anyone with a Gnut who’s not using him for that.
@katana: Exuzar’s Totem isn’t for champions who apply crowd control, it’s meant for those who cleanse or resist it. The Turn Meter boost shines on champions like Mithrala or Uugo, letting them react faster after stripping debuffs. It’s effective against CC appliers such as Fabian, not something Fabian himself would benefit from. I have reupdated Exuzar’s Totem guide description to prevent this confusion.
The description for Exuzar Totem says it’s recommended for Entertainer Fabian, but doesn’t it lack any particular synergy? Wouldn’t characters with cleansing abilities or traits that prevent ailment benefit from it more?
@North Strider: I have corrected the description for Hoarder’s Cauldron relic. Thanks for highlighting this!
Your description of Hoarder’s Cauldron is completely different from that in the Relic Section of the Game
@Rattenmaster: You can earn Gemstones by defeating the Chimera Clan Boss each week. The tougher the difficulty you manage to clear, the higher the rarity of the Gemstone you’ll receive. Occasionally, special events also offer Gemstones as rewards, though these opportunities have become quite rare nowadays.
Sorry für die Frage aber wo bekommt man die Edelsteine für die Relikte, habe im internet gesucht und keine antwort gefunden.
Danke für hilfreiche antworten
@Ande: You can obtain relics by crafting them in the Forge or obtaining them by completing specific events/tournaments.
@Eri: Removal cost is the same both Gemstone and Relic of the same rarity.
Cost 640 Starstone to remove Mythical Gemstone or Relic
Cost 320 Starstone to remove Legendary Gemstone or Relic
Cost 160 Starstone to remove Epic Gemstone or Relic
Cost 80 Starstone to remove Rare Gemstone or Relic
Removal cost for each rank of gemstone? Removal cost for each rank of relic? Upgrade cost for relics?
After 6-months I still cannot find answers to some very basic questions. For example, how and where do I find/get relics?
The Wand of Submission is most effectively utilized by UDK and taunt champions. When equipped on UDK, it dramatically increases its activation frequency by drawing in enemy attacks and reflecting them.
Would be useful to have a guide as to where to find the relics and gems
would be useful to know where to find wach of the relics and gems
excellent coverage on all but one aspect of the relics that i am looking for.
Which relics can be use with which relic to upgrade it rank.
I have so many relics that i cant dispose of because they do not want to be used for rank up. even the same relic cannot be used with itself for a rank boost.
I know you’ve mentioned it in a broad sense of my question, yes they can all be used to rank up other relics. But i am inquiring for specifics, even a chart. If i missed this topic and you did discuss it with specifics on each individual relic can be used to rank up another individual relic, i apologize. I’m scanning to fast i suppose.
@Steve Bratcher: I’ll be adding those new relics (Chaos Awakes and Discovery Relics) that are introduced into the game. Thanks!
@Ted Clark, click on the Relics tab on any Champion, bottom left of the Relics page, “Equip”.
@Ayumilove, missing the “Chaos Awakes” group, and the “Sinner’s Cloak” relic.
I hate to sound stupid and ignorant here, but how the hell do you add them? I have many but no idea how to add them!!!!
sigNed
“DUMB DUMB”
It is written that it is best to give the Journal of necrotosto Tagore, but wouldn’t Gorgorab be more suitable since he can make use of both turn meter increase and healing boost?
Hey there! I have a question. Can 2 of the same type of gemstones be inserted into a relic and the benefits be doubled? The relic allowed me to insert 2 identical gemstones but I’m wondering if it will actually produce double benefits or just be redundant and wasted. Thanks!