Talesworth Adventure Crypt Levels
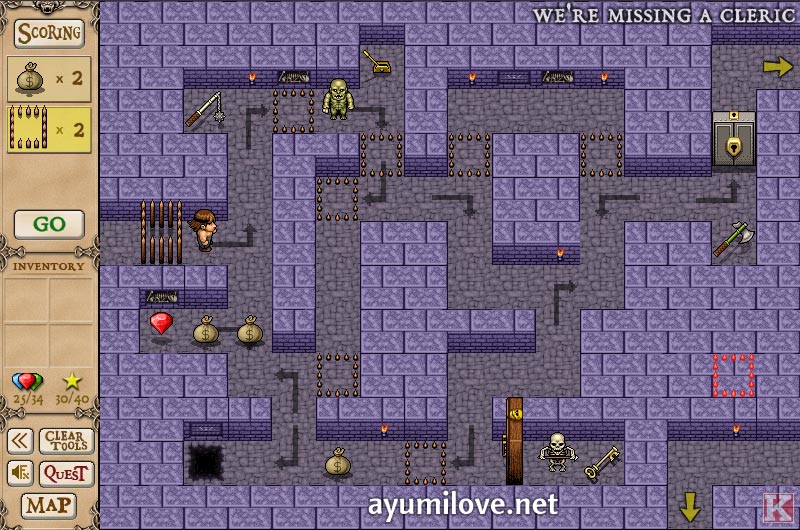
We’re Missing a Cleric (Gold)
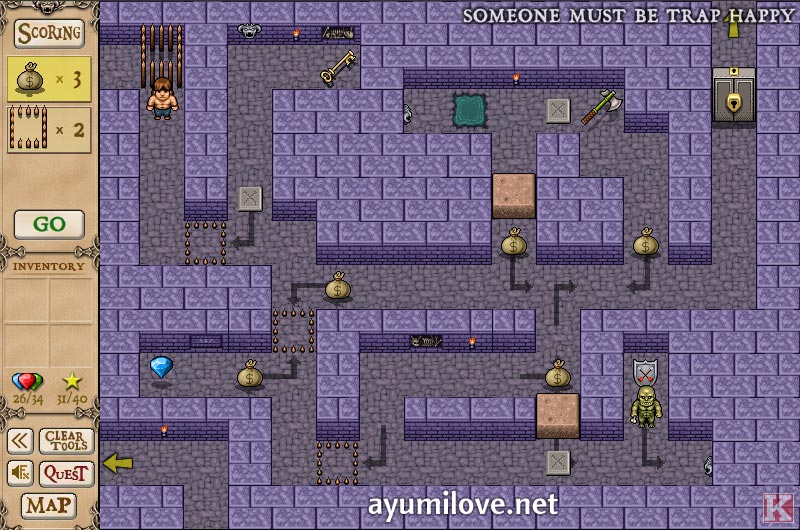
Someone Must Be Trap Happy (Platinum)
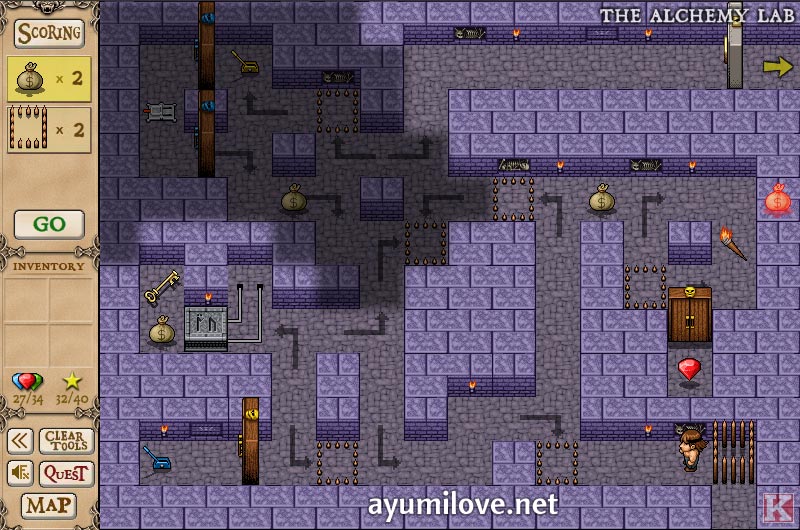
The Alchemy Lab (Gold)
Ok Now, Don’t Move (Gold)

The Chamber of Souls (Gold)

Deadly Loot (Gold)

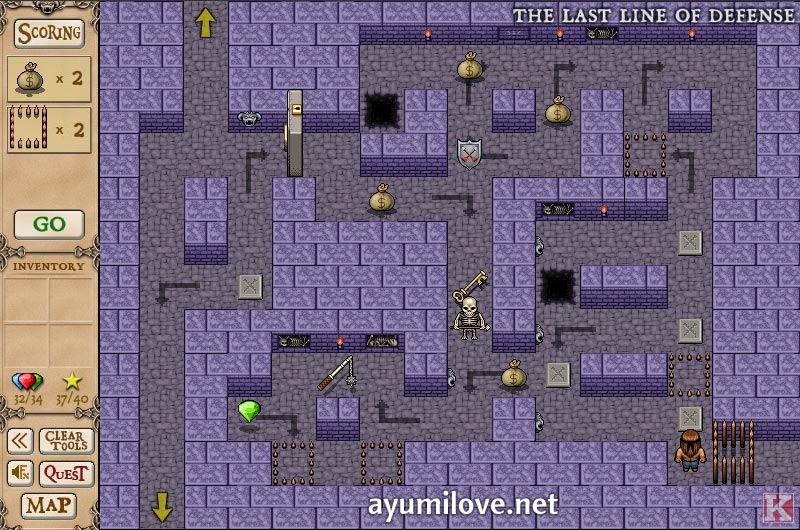
The Last Line of Defense (Gold)
After completing this stage, place Gold Bag at North to access The Treasure Chamber.
The Treasure Chamber (Platinum)

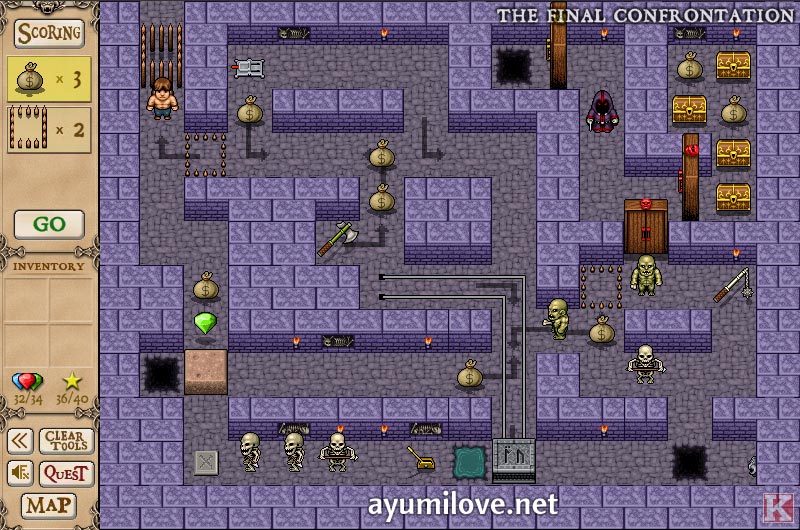
The Final Confrontation (Platinum)
Questy’s brilliant skills of deduction led him to the yellow lever that controlled the pit door. He pulled with all his might! Boneyard barrelled head first into the Deadly Pit of Doom, cursing Questy’s name as he promised to star in a sequel! With Boneyard out of the way, Questy chopped down the red doors and made his way to Boneyard’s sparkling hoard of loot!
Talesworth is once again safe, but for how long? Even as Questy basks in his recent victory over Boneyard, a handful of young, ambitious villians around the Kingdom plot and scheme in a most treachorous fashion. Be ready, brave adventurer, for you shall be needed again all too soon. Thank you for spending time in Talesworth. I hope you had fun!
Theres a better solution to Veiled Retreat (Super Platinum) Remove the gate at the beginning, the gate in line with the yellow switch and the loot bag above the green switch. Place the loot bag near the beginning above the non removed gate (betweent he first two arrows) and then place another gate to the right of the blue switch. You should have two extra gates.
Awesome!! Beat the game WAAAAAy fast than if I’d have done it on my own. Thanks!
Wow, just Wow. Your guide is AMAZING. The screenshots make it easy to understand, and now I can actually complete the game. Thank you for making this. *bookmarks sites* 😀
Hi Bronnergus. Thanks for leaving a comment! If you have found some maps that can score Platinum, post a comment here and I’ll update this guide. Your contribution can help others too.
Thx so very much for this tutorial!
All accomplishments achieved + bonus rooms + everything needed + all gold ranks! Amazing walkthrough!
ayumilove.com FTW!
Updated all levels with Gold and Platinum!
Added screenshots and some descriptions.
Hi Zack, I have updated The Mountain Horror (Mountain #8 – Final) Gold Screenshot!
for the mountain levels, the boss screenshot isnt a gold rank…
Thanks David! I have updated Simple Green Screesnhot to score Platinum Star!
Aw, no platinum solutions? The only one I have so far is Simple Green, you don’t need the second loot bag that he’ll get in your setup. Take it out for a platinum finish.