Talesworth Adventure Training
The Basic Movement
Welcome to Adventurer’s Training For Adventurers. Let’s get started! Your job in each room is to protect Questy and guide him to victory. He will barrel along in the same direction until he is forced to turn. His main task in each room is to get the key and reach the exit. Click Go to send him on his way!

Love for the Loot Bag
Questy loves loot bags and is easily lured by them. Place a loot bag from your toolbox on the green X to lure him and click GO.

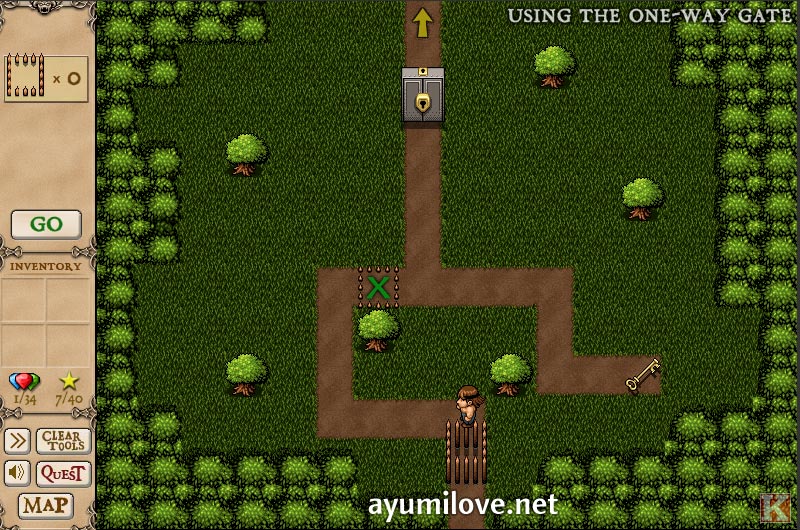
Using the One-Way Gate
One-way gates is another type of tool that all adventurers need. Once Questy passes through one, it will block that space. Place a One-Way gate from your toolbox on the Green X and click GO.
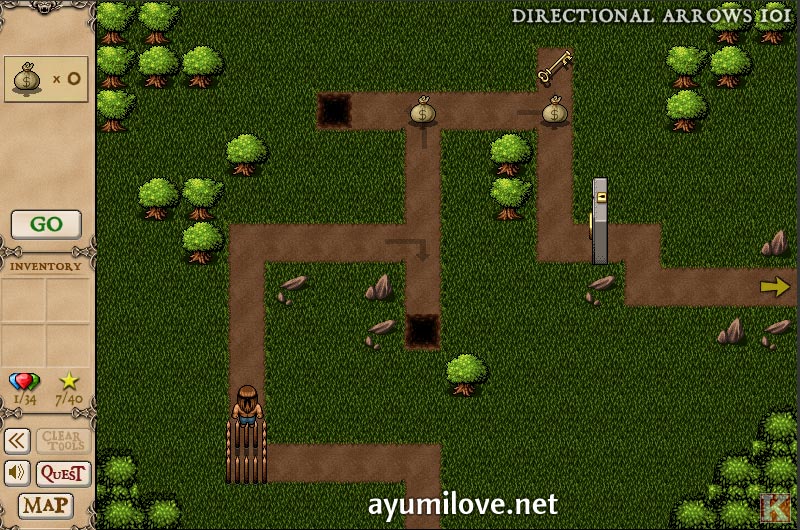
Directional Arrows 101
All 3-way intersections have a decision arrow that help Questy choose which way to turn. However, Questy’s love for loot bags is quite strong. He can be swayed to disobey these arrows.
There is Much Peril
Questy will need your help to survive in Talesworth. Dangerous foes can be defeated with weapons that match their color. Watch out for Pressure plates that trigger arrow traps!

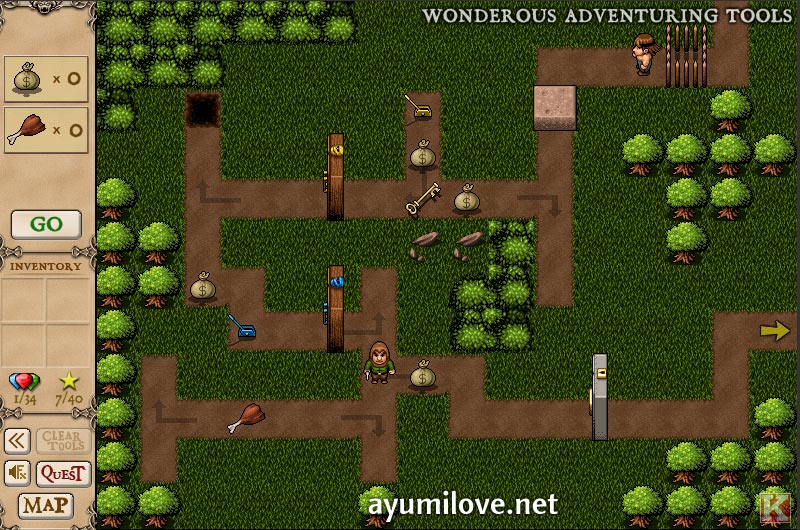
Wonderous Adventuring Tools
There are many fun devices you will find. Some blocks can be pushed and moved. Levers are color-coded to open the corresponding doors. You may also find a haunch of meat in your toolbox that you can use to lure bad guys.
Shiny Gems Take More Work
You will see shiny gems throughout Talesworth. It is never required to obtain a gem to complete a room, but a true adventurer leaves no loot behind! Click the Scoring Button above your loot bag tool to get help on how to be a hero. Now, go get that treasure chest to complete your training!
Simply Survive for a Bronze star.
Solve a room with the gem for a Silver Star.
Or, solve a room with the gem AND limited tools for a Gold Star!

Theres a better solution to Veiled Retreat (Super Platinum) Remove the gate at the beginning, the gate in line with the yellow switch and the loot bag above the green switch. Place the loot bag near the beginning above the non removed gate (betweent he first two arrows) and then place another gate to the right of the blue switch. You should have two extra gates.
Awesome!! Beat the game WAAAAAy fast than if I’d have done it on my own. Thanks!
Wow, just Wow. Your guide is AMAZING. The screenshots make it easy to understand, and now I can actually complete the game. Thank you for making this. *bookmarks sites* 😀
Hi Bronnergus. Thanks for leaving a comment! If you have found some maps that can score Platinum, post a comment here and I’ll update this guide. Your contribution can help others too.
Thx so very much for this tutorial!
All accomplishments achieved + bonus rooms + everything needed + all gold ranks! Amazing walkthrough!
ayumilove.com FTW!
Updated all levels with Gold and Platinum!
Added screenshots and some descriptions.
Hi Zack, I have updated The Mountain Horror (Mountain #8 – Final) Gold Screenshot!
for the mountain levels, the boss screenshot isnt a gold rank…
Thanks David! I have updated Simple Green Screesnhot to score Platinum Star!
Aw, no platinum solutions? The only one I have so far is Simple Green, you don’t need the second loot bag that he’ll get in your setup. Take it out for a platinum finish.